Archives

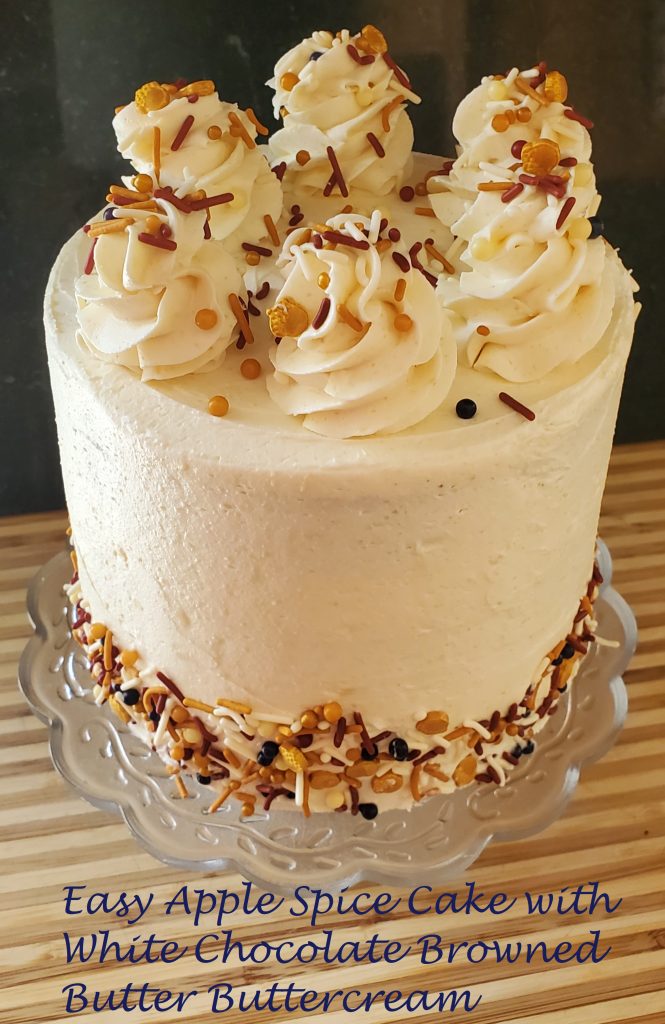
Easy Apple Spice Cake with White Chocolate Browned Butter Buttercream

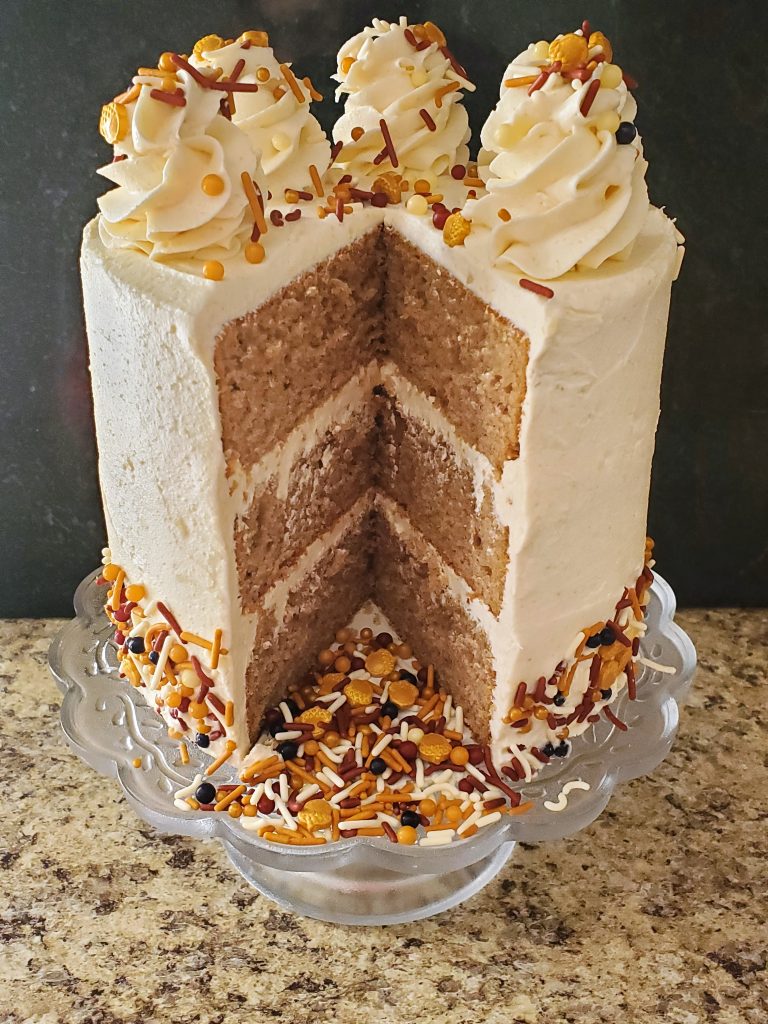
A super-easy apple spice cake made from a mix, with a perfectly fluffy white chocolate browned butter buttercream that has only two ingredients. It’s the cake that this early fall season is begging for!

I hadn’t really planned on sharing this recipe, but I decided it was too delicious not to. It all came about mostly by accident. I was shopping at Wal-Mart this week, and found the sprinkles I ended up using on this cake. I love fall, and I love sprinkles, and I didn’t have these…so I couldn’t help myself and bought them. Look at how perfectly fall-inspired they are! But then I needed to make something to use them on. When I got home, I started thinking about what I could bake that needed these sprinkles. I remembered I had a spice cake mix in the pantry, so I pulled that out and started mixing it up. But to add just a little more fall flavor, I decided to use unsweetened applesauce in place of the oil. It adds just the slightest hint of apple that works so well with the spice cake.
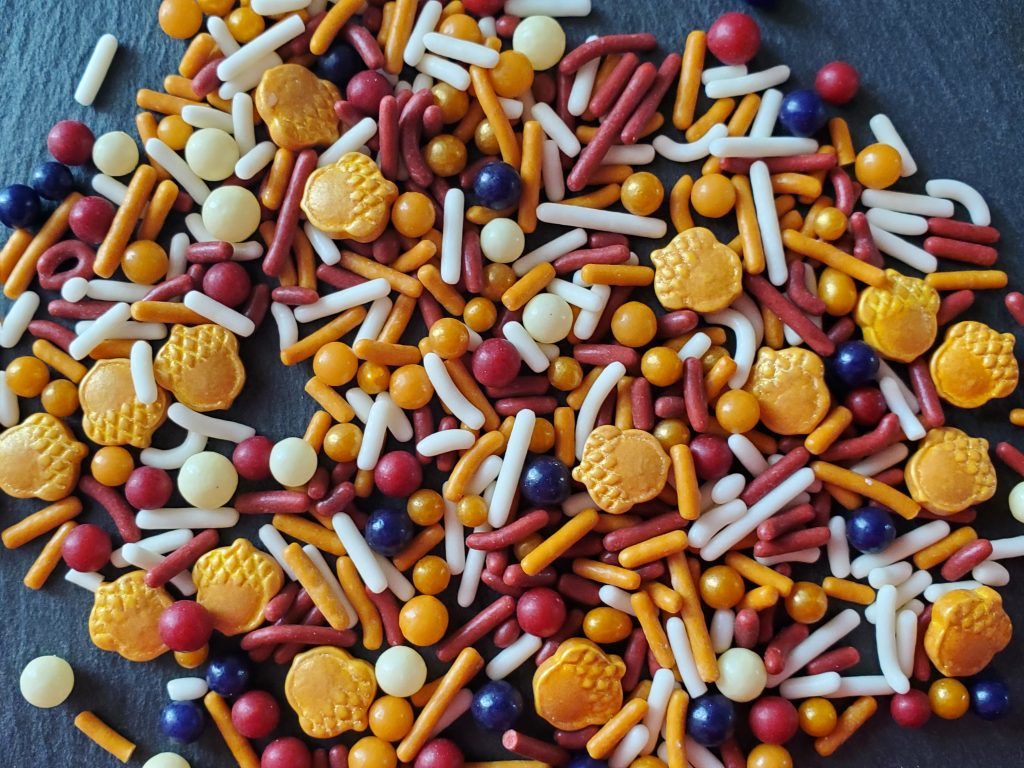
I know, that’s not much of a recipe yet. But then I needed to make a frosting for it. I was going to just make my standard browned butter buttercream, but I checked my baking supplies and realized I was pretty low on powdered sugar. I wasn’t sure I would have enough for a full batch of buttercream. So I thought I would make Swiss meringue buttercream with browned butter. And I checked my eggs. Not enough of those either. (I’ve been out of town for work and haven’t been baking much.) At this point I was getting desperate, because I really didn’t want to go back to the store. And my cake was already in the oven. That’s when I remembered a two-ingredient chocolate frosting I had tried previously, and wondered if it could be made with white chocolate. I went back to the original blogger, and sure enough, it can be made with white chocolate chips! At this point I was fairly certain I could also use browned butter, so I just went for it. It was the right decision. This frosting is not too sweet, and the combination of white chocolate and nutty browned butter pair perfectly with the spice cake.
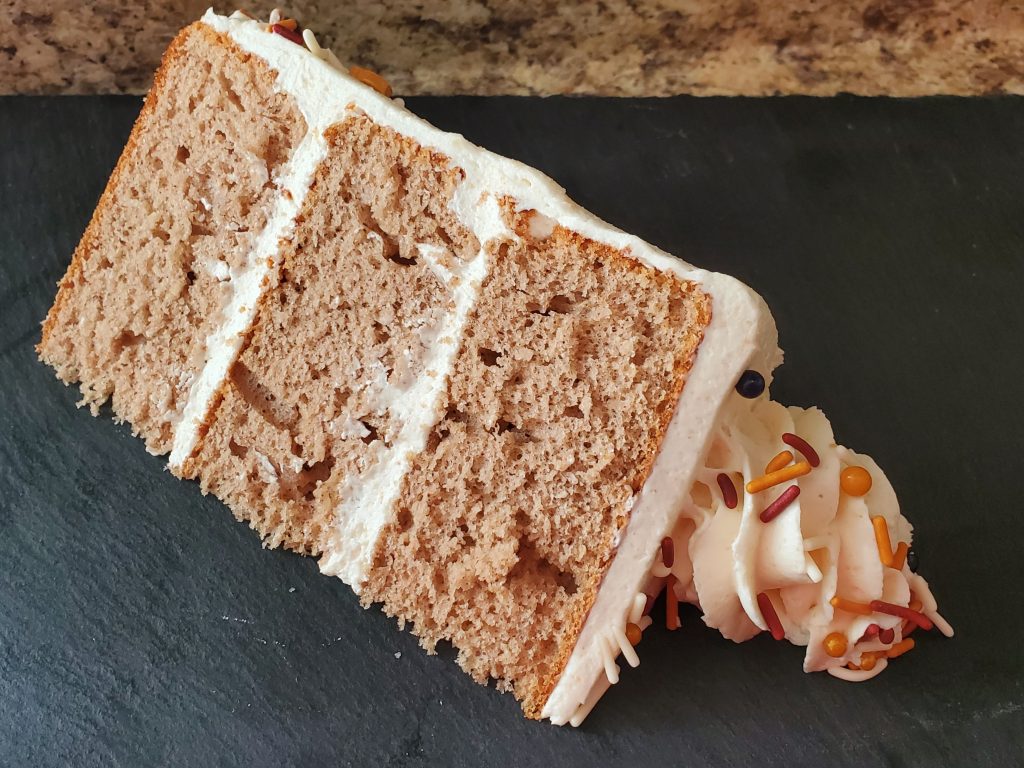
Anyone can make this frosting. Seriously, anyone. And it’s so impressive, even if you’re not a baker people will be raving over this dessert. All you do is brown butter and add white chocolate chips. To brown the butter, put it in a light-colored (not non-stick) pan and melt it over medium-low heat. It will start to bubble – that’s what you want. Let it continue to cook until you start to see brown spots at the bottom. That’s the milk solids starting to brown, which is what gives it a nutty flavor. Once the melted butter is golden and the bits are a medium brown, take it off the heat and cool it slightly. Once it is warm, but not hot, add the white chocolate chips and let them melt. Chill it until solid, bring to room temperature, and whip it up. That’s it. Delicious, sophisticated frosting with almost no effort.

I baked this in three 6-inch pans, but you can bake it in any pans you would like. Use two 8- or 9-inch, or even a 9×13-inch pan for an even easier dessert. Want to mix it up and make it your own? Add some chopped, toasted pecans on top or in the middle frosting layers. Use apple cider instead of water in the cake for an even more prominent apple flavor. Add a drizzle of caramel or melted cookie butter on top (definitely going that route next time myself!). Which ever way you make it, just make sure to give this frosting a try. It couldn’t be easier, and it will definitely impress your friends and family!
Print Recipe
Easy Apple Spice Cake with White Chocolate Browned Butter Buttercream
Servings
Ingredients
Cake
Frosting
Servings
Ingredients
Cake
Frosting
Instructions
Cake
  1. Combine all ingredients in mixing bowl. Mix on low speed just until combined. Increase speed to high and mix for 2 minutes.
  2. Divide batter evenly between two greased 8- or 9-inch pans, or three greased 6-inch pans.
  3. Bake at 350 degrees F for 20-28 minutes, depending on size of pans.
  4. Cool on wire racks for 5 minutes. Remove from pans and cool completely.
Frosting
  1. Melt butter in a medium saucepan over medium-low heat. Continue cooking until butter boils and begins to brown. Once solids have lightly browned and liquid is golden in color, remove from heat and transfer to a heat-proof bowl.
  2. Let cool slightly before adding white chocolate chips. Butter should be warm enough to melt the chocolate, but not so hot it will burn. If butter has cooled to far, microwave in 30 second bursts until chocolate is melted.
  3. Cool mixture in the refrigerator until solidified. Remove from refrigerator and bring back to cool room temperature.
  4. Place in large mixing bowl and beat at medium speed with whisk attachment until light and fluffy, about 2 minutes.
  5. Fill and frost cake.
Recipe Notes
  • Use apple cider instead of water in the cake mix for even more apple flavor.
  • Add chopped, toasted pecans on top or in the middle frosting layers.
  • Drizzle the top with caramel or melted cookie butter.
Share this Recipe
 

Lemon Meringue Ice Cream Cake

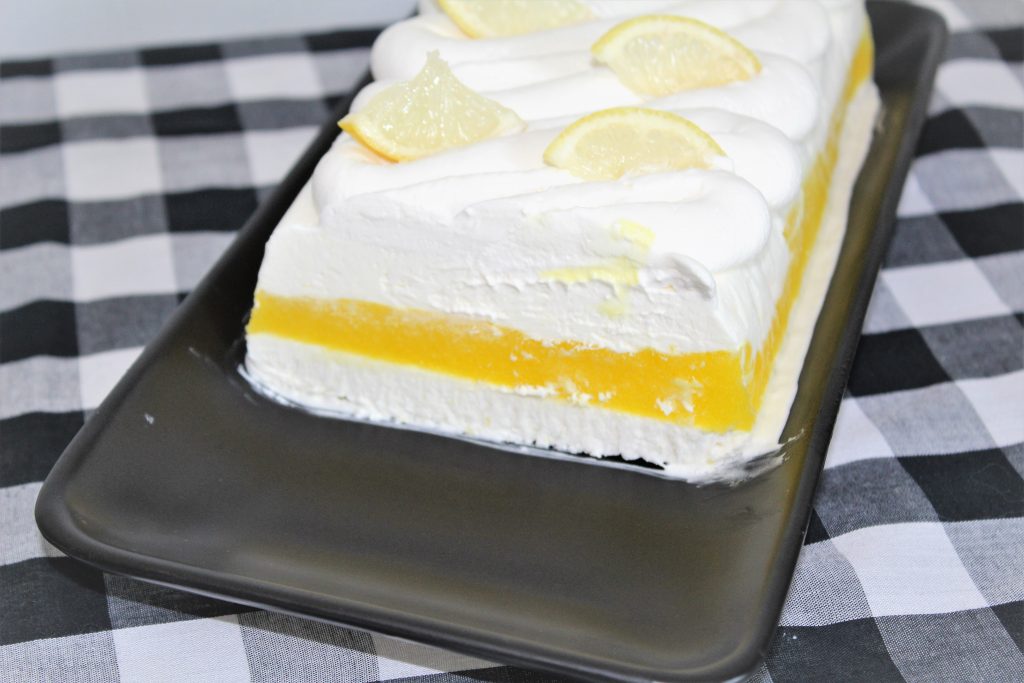
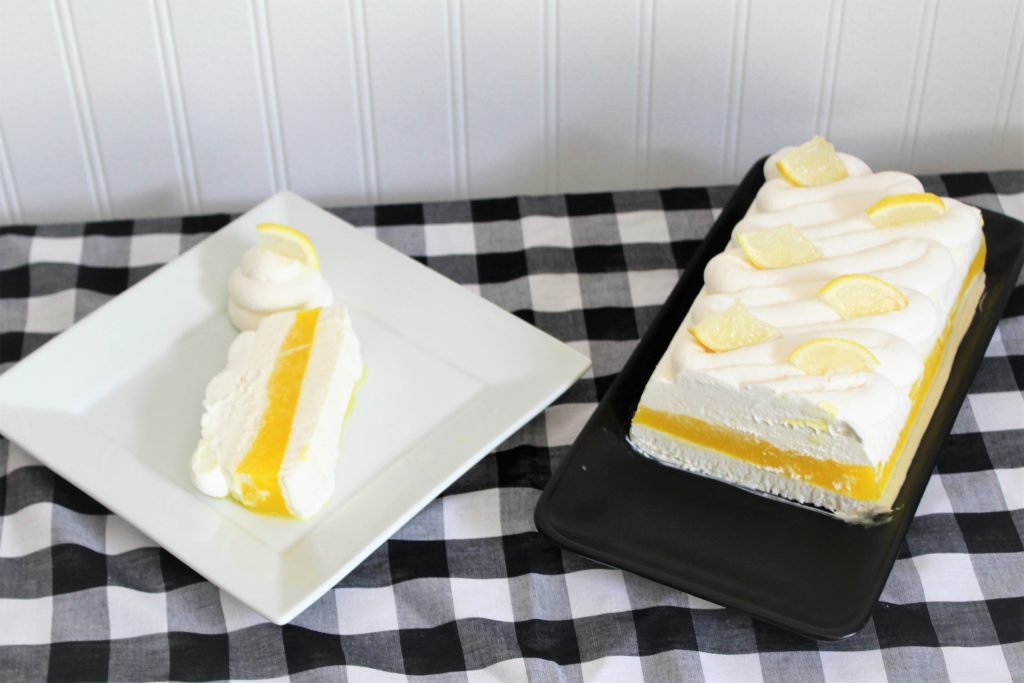
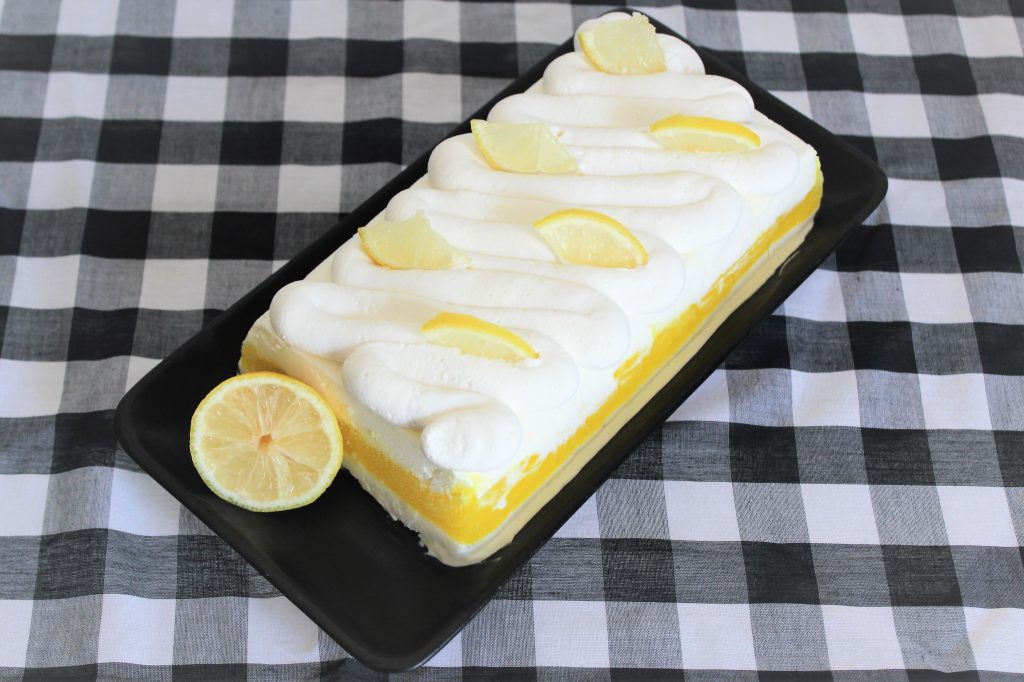
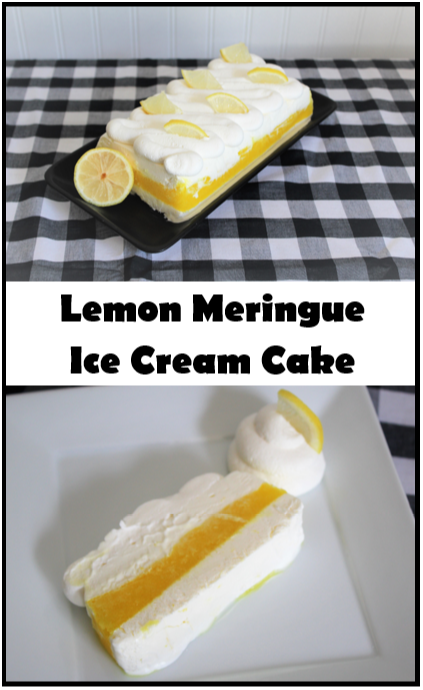
With all of the hot weather we’re currently having, I’ve been craving ice cream and bright citrus flavors. And this Lemon Meringue Ice Cream Cake perfectly fits the bill! It’s a tart lemon sorbet surrounded by layers of creamy lemon ice cream, all topped with whipped cream. And the best part is that it’s all no-churn so anyone can make it!

I know layered desserts can look intimidating, but I assure you, this recipe couldn’t be any easier. Yes, it takes a little time since you have to chill each layer, but most of that time is hand’s off.

The middle layer is a no-churn lemon sorbet. It’s so simple and uses only a handful of basic ingredients. Please, please, please use fresh lemons. Not only so you can add the peel, which adds a ton of flavor without the tartness, but because bottled lemon juice is just not the same. I made my sorbet very tart, since I love strong citrus flavor, but you can increase the sugar to 3/4 cup if you prefer your lemon desserts to be a little sweeter. Just heat the water, sugar, salt, and peel until the sugar is dissolved. Add the lemon juice, cool, and strain. Add in a tablespoon of vodka if you’d like, which is just a little extra insurance to keep it from freezing quite so firm. If you don’t have it or don’t want to use it, it will still be great. I also added a few drops of food coloring just because I wanted a bright yellow color. Then freeze until mostly solid. Blitz it up in a food processor or blender, and freeze again until solid. Easy!

The lemon ice cream is even easier, if that’s possible. It’s a basic no-churn ice cream (heavy cream and sweetened condensed milk) with the addition of lemon juice and zest. Stir together the lemon juice, lemon zest, and sweetened condensed milk. Whip the cream, and fold in the sweetened condensed milk mixture and you have an ice cream base ready to freeze. This recipe makes a half batch of ice cream, which means you have half a can of sweetened condensed milk left. You can double the recipe to use a full can and freeze half of the ice cream in its own container if you prefer.

I topped mine with homemade sweetened whipped cream (heavy cream and powdered sugar), but you could also use Cool Whip. Or for a true lemon meringue pie feel, go ahead and top it with meringue (and torch it if you like!). Yes, you can freeze leftovers with meringue or whipped cream on top.

And don’t confine yourself to lemon. You can substitute any citrus in equal parts for the lemon. I personally love lime and can’t wait to try a lime version. Grapefruit or orange would be super refreshing. Or try mixing flavors! How about lime sorbet with lemon ice cream? Or orange sorbet with vanilla ice cream (just leave out the citrus and add vanilla extract to the ice cream base). I’m sure blood oranges would make a stunning dessert when they are in season as well.

Don’t let the layers intimidate you. It may look fancy, but truly anyone can make it. It uses basic pantry ingredients and no fancy equipment. Give this one a try, you are sure to impress guests with this one!

Print Recipe
Lemon Meringue Ice Cream Cake
Servings
slices
Ingredients
Sorbet
Ice Cream
Servings
slices
Ingredients
Sorbet
Ice Cream
Instructions
  1. Combine water, sugar, and salt in a small saucepan. Use a vegetable peeler to remove large strips of peel from the lemons, leaving the white pith on the lemon. Add peel to the saucepan and heat over medium heat until just beginning to bubble and sugar is completely dissolved.
  2. Remove from heat, add lemon juice, and vodka and food coloring if using, and set aside to cool for 10 minutes.
  3. Pour through a strainer into a freezer-safe container and freeze until nearly solid, 3 to 4 hours.
  4. While sorbet is freezing, make the ice cream base. Stir together sweetened condensed milk, lemon zest, and lemon juice.
  5. Whip the cream until stiff peaks form. Fold in the sweetened condensed milk mixture.
  6. Line a 9"x 5" loaf pan with waxed paper, leaving a portion overhanging. I left the short ends un-lined.
  7. Pour half of the ice cream base into the loaf pan and smooth out. Cover and place loaf pan in the freezer and freeze until firm, about 3 to 4 hours. Store the remaining ice cream base in the refrigerator, tightly covered.
  8. Once sorbet is nearly frozen, break into chunks and place in blender or food processor. Blitz until slushy. If ice cream layer is firm, pour slushy sorbet mix directly on top, cover, and freeze until firm, 1 to 2 hours. If ice cream base is not yet set, place sorbet mix back into a separate container and return to freezer until ready to use.
  9. Once sorbet layer is firm, pour on remaining ice cream mixture, cover, and freeze until firm, 3 to 4 hours or overnight.
  10. To remove from pan, run a knife along the edges that aren't lined with waxed paper. Pull ice cream out of pan with overhanging paper. If it won't come loose, dip pan in 1 to 2 inches of hot water for just a few seconds. Invert ice cream onto a serving platter.
  11. Top with sweetened whipped cream, Cool Whip, or even meringue. Torch meringue if desired. Store leftovers in the freezer, covered, even with whipped cream or meringue.
Recipe Notes
  • Use any citrus fruit you'd like.
  • Mix flavors - use one flavor for the sorbet and another for the ice cream.
Share this Recipe

Slow Cooker Meatballs and Rice

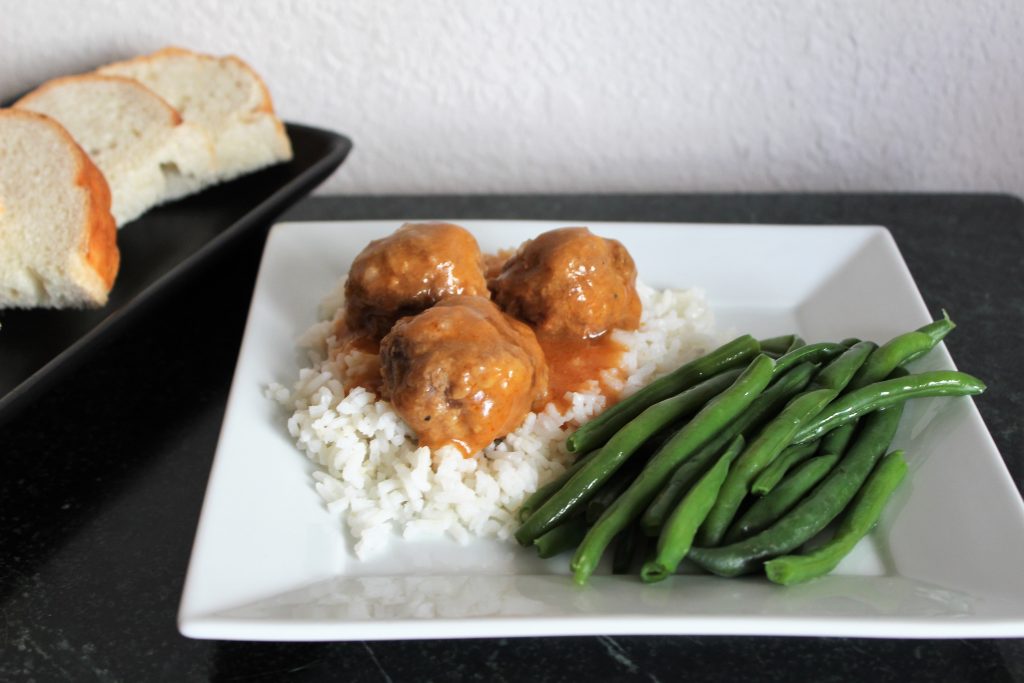
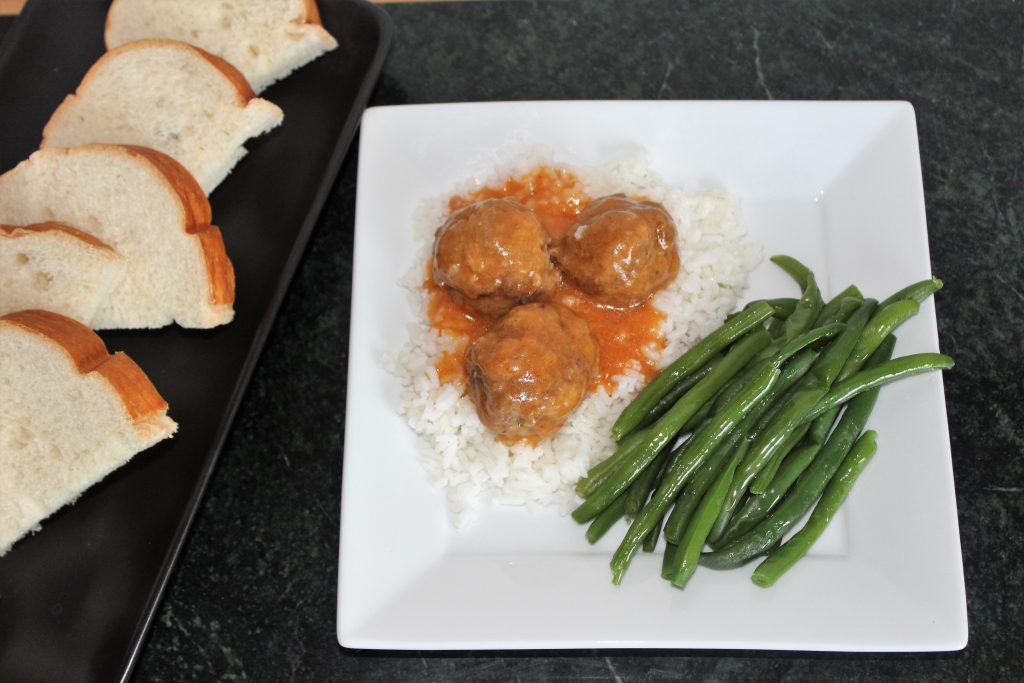
Hi everyone! I have something a little different for you today. I know I normally bring you baked goods, but everyone needs quick and easy dinner recipes, and I have one for you today. This was one of my favorite meals growing up – a sort of sweet and sour meatball served over rice. It’s definitely not  your standard Italian or Swedish meatball recipe, but it is really delicious. And kids love them!

You start by making pretty basic beef meatballs. Then you cook them in the sauce – no browning ahead of time needed. The sauce is really simple – just four ingredients (plus water) that you probably have in your pantry.  Ketchup, mustard, flour, and sugar. Four simple ingredients, but together they are more than the sum of their parts.

My mom always cooked these in a casserole dish in the oven, but I converted it to a slow cooker recipe. She thinks her aunt, who gave her the recipe, often made them in a slow cooker as well. Use whichever method works best for you and your schedule.

Although I haven’t strayed too far from the original recipe, I feel confident you could use your favorite meatball recipe with this sauce. Just don’t cook the meatballs ahead of time. I would probably skip on highly flavored recipes like sausage-based ones, but I think this would be a great place to substitute ground turkey or chicken. Since the meatballs cook in the sauce, there is less chance they will end up dry.

We always ate these meatballs over minute rice, but any type of rice or other starch would work well. You definitely want something to help soak up that sauce. Add in a vegetable, and you’ve got a quick, easy weeknight meal!


Print Recipe


Slow Cooker Meatballs and Rice

Course Main Dish

Servings
people


Ingredients
Meatballs

Sauce

Course Main Dish

Servings
people


Ingredients
Meatballs

Sauce


Instructions
  1. Combine all meatball ingredients until well mixed.

  2. Form into slightly-larger-than golf ball sized balls. I use a regular size ice cream scoop to keep them even. Place into slow cooker (or casserole dish).

  3. Combine all sauce ingredients and whisk until sugar is dissolved and flour in incorporated.

  4. Pour sauce over meatballs. Add water if needed to just cover meatballs.

  5. In slow cooker, cook on low for 6 to 8 hours or on high for 3 to 4 hours. In the oven, cook for about 1 hour at 350 degrees F.

  6. Serve over rice.


Recipe Notes
  • Recipe can be doubled (or tripled if you have a big enough pan.
  • Serve over the starch of your choice.
  • Feel free to experiment with other meat choices - turkey, chicken, etc.


Share this Recipe

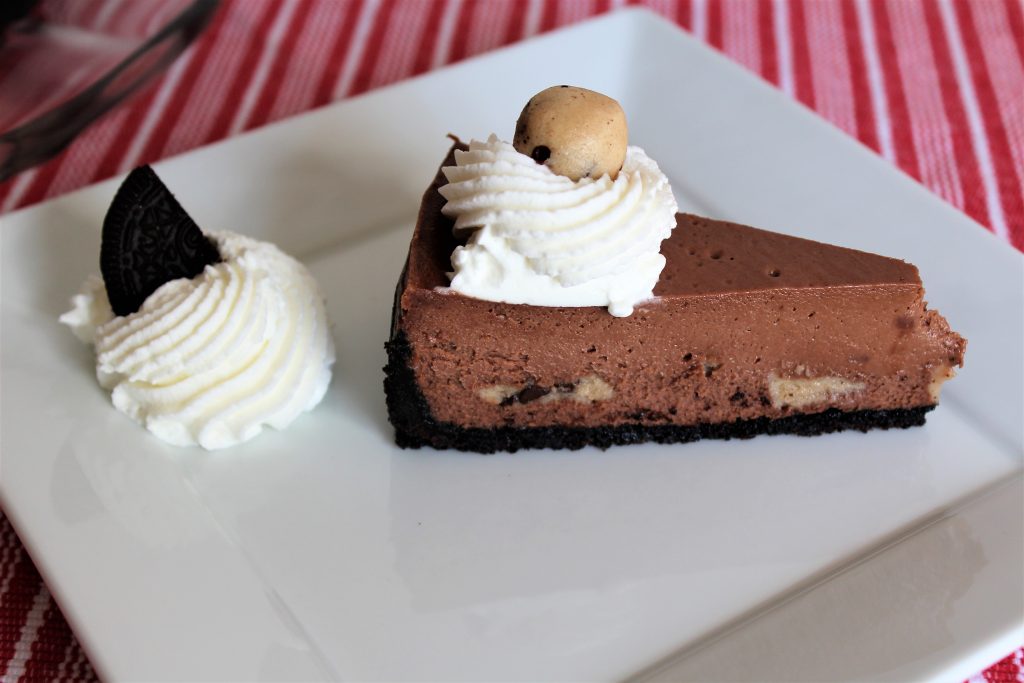
Cookies and Coffee Cheesecake

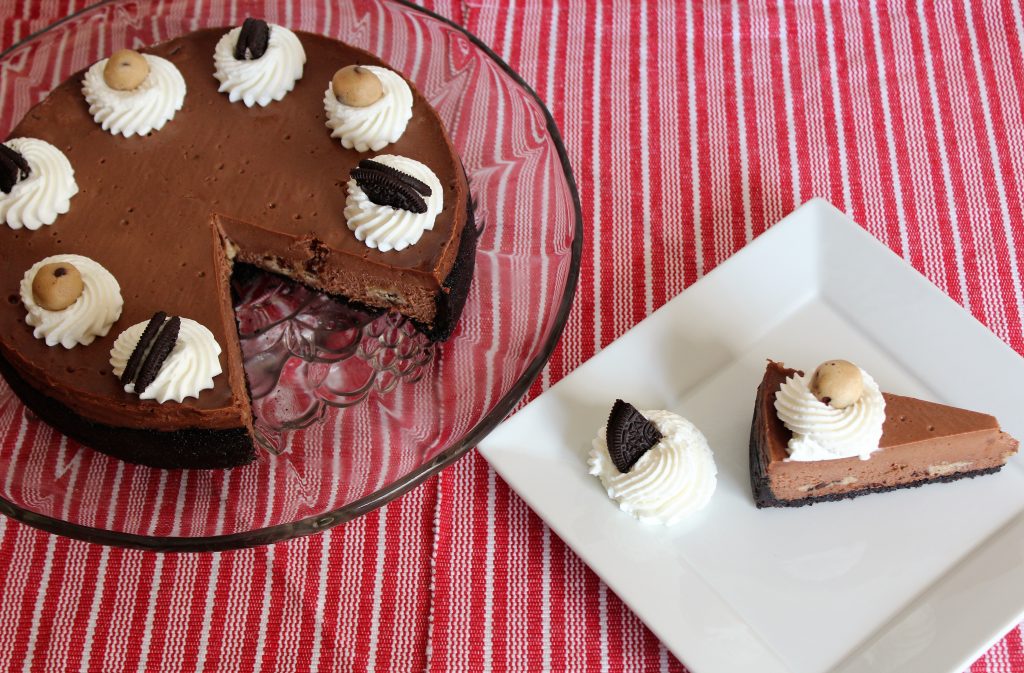
A rich mocha cheesecake with Oreo crust and cookie dough throughout! It’s a spin on my favorite flavor of ice cream.

Do you have Turkey Hill ice cream where you live? If you do, have you tried their Double Dunker flavor? They describe it as “mocha ice cream swirled with cookie dough and crunchy chocolate cookie swirl”. I describe it as perfect. They only just recently started carrying it in stores here in Kansas City, so I was driving 2 hours to the nearest store to get it. Yes, really. It’s that good. If it’s in stores near you, go get some right now. It’s ok – I’ll wait.

For those of you who don’t have this flavor available near you, or who don’t want to run right out to the store, I turned it into a cheesecake! I started with an Oreo crust to mimic the cookie swirl. Then there are the cookie dough pieces embedded in the mocha cheesecake. Somehow they all work sooo good together.


Yes, there are a lot of steps in this. Yes, it is worth it. It’s probably not something you’ll make for a simple weeknight dessert, but it would be great for a party or other get together. It can easily serve 12, so there is plenty to go around. Plus, you can make it over several days so there is no last minute rush. 

I like to toast the flour in the cookie dough since I keep a bit to top it with that is completely uncooked. You don’t have to do this, but since there is a chance that raw flour can contain E. Coli, I usually do if I am serving it to guests. I cook the cheesecake at a low temperature, so there is no need for a water bath. And I don’t really like springform pans, so I use Alton Brown’s method and bake it in a regular cake pan. Yes, it does come out. Promise. You can use a springform if you prefer.

You say you don’t like coffee? Leave out the coffee for a straight chocolate cheesecake. Don’t want to make the cookie dough (or not a fan of raw dough), then use chopped chocolate chip cookies instead. And if you want a cookies and milk cake instead, use your favorite vanilla cheesecake batter with the Oreo crust and cookie dough pieces. However you make it, make this soon. And make sure to try the ice cream too!


Print Recipe
Cookies and Coffee Cheesecake
A rich mocha cheesecake with an Oreo crust and cookie dough pieces.
Servings
people
Ingredients
Crust
Servings
people
Ingredients
Crust
Instructions
Crust
  1. Place cookies in a food processor and pulse until it reaches fine crumbs.
  2. Add melted butter and pulse until combined.
  3. Line a 9"x2" cake pan with parchment paper on the bottom (with a round) and the sides (with a strip). Use baking spray below the parchment to keep it in place, and spray parchment with baking spray before adding crust. You may also use a 9" springform pan. Use only a parchment round on the bottom and spray with baking spray.
  4. Press crumbs onto the bottom and 1" up the sides of the pan.
  5. Bake at 300 degrees F for 10 minutes. Cool.
Filling
  1. Combine chocolate chips, cream, and instant coffee granules in a microwave safe bowl and microwave for 40 seconds, stirring halfway through. If chips are not fully melted, microwave additional 10 seconds. Set aside.
  2. Beat cream cheese and sugar with a mixer until smooth.
  3. Add cocoa powder and beat until combined.
  4. Add eggs, one at a time, beating well after each addition.
  5. Add the vanilla and reserved chocolate-coffee mixture and mix until combined.
  6. Pour mixture into cooled crust.
  7. Remove cookie dough from refrigerator or freezer and slice into 1/2-inch pieces. Press pieces into cheesecake filling, distributing evenly and making sure all cookie dough is covered by the cheesecake batter.
  8. Bake cheesecake at 250-degrees F (no water bath needed!), for 1 hour 15 minutes to 1 hour 30 minutes. Cheesecake is done when the center 4 inches is still slightly wobbly. The chocolate will ensure it sets completely once cooled.
  9. Cool cheesecake until near room temperature and then refrigerate at least 8 hours or overnight,
  10. To remove from cake pan, fill sink with about 1/2-inch of very hot tap water. Set pan into water for 1 minute. The strip of parchment around edge of pan should slide out. Slide a knife around the edge after removing paper to assure everything is released from the sides. Place a piece of parchment paper on top of the cheesecake, and turn it over onto a large plate or extra serving platter. Cheesecake should release from the bottom and fall onto the plate. If it does not, return to hot water for additional 30 seconds. Remove parchment from bottom of cheesecake and invert onto final serving platter.
Recipe Notes
  • You can omit the coffee if you prefer a regular chocolate flavor.
  • Use store-bought or homemade chocolate chip cookies instead of the cookie dough.
  • For a cookies and milk cake, use your favorite vanilla cheesecake batter with the Oreo crust and cookie dough filling.
Share this Recipe
 

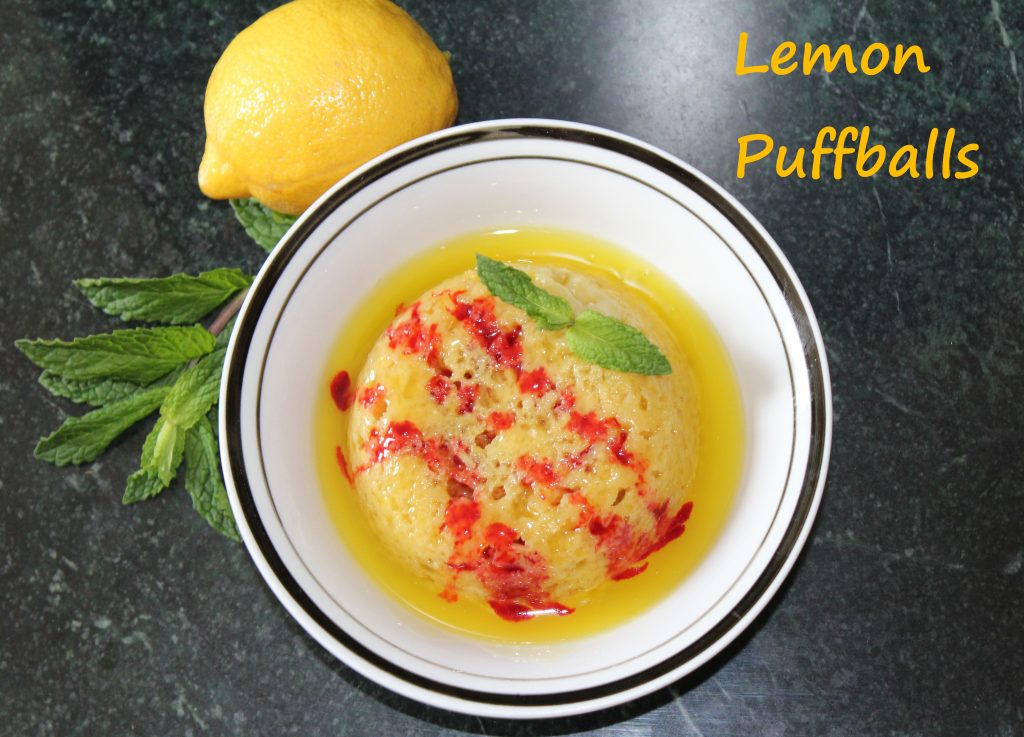
Lemon Puff Balls

Today I’m bringing you a recipe that is a twist on a childhood favorite of mine – chocolate puff balls. I’ll share that recipe with you soon, but since I just posted a chocolate recipe , I decided to mix things up a bit.

Are you still dealing with winter where you are? Spring seems to have sprung here, much to my dismay. I definitely miss the cold, snowy winters of Cleveland. The spring weather here is finally convincing me to bake things a little less heavy and rich. I have tossed around the idea of lemon puff balls for some time, and this weekend I finally tackled them.

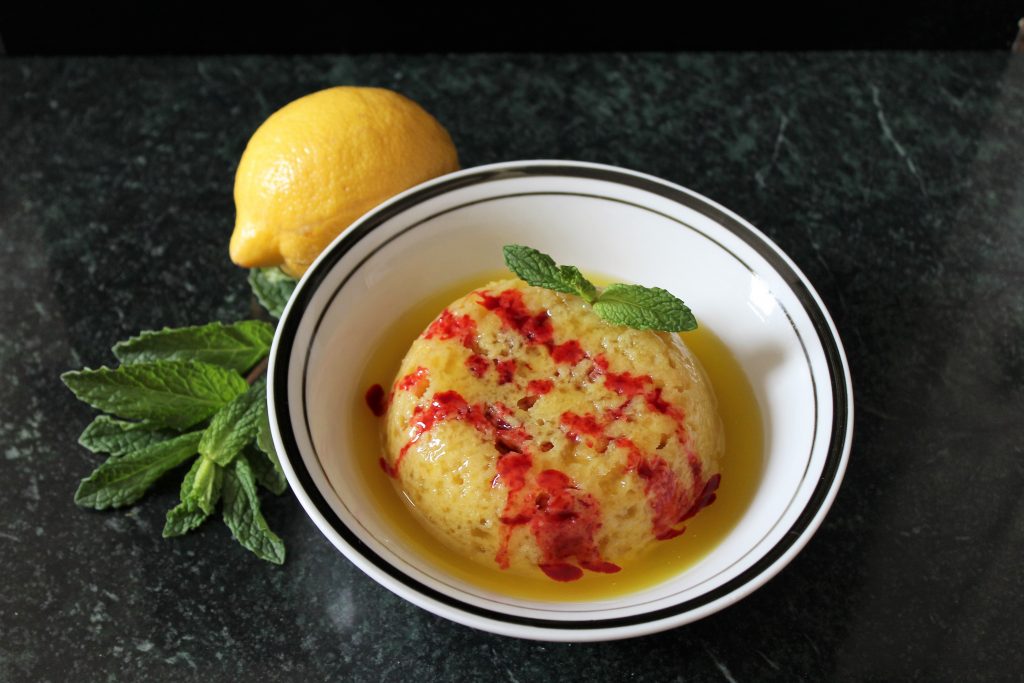
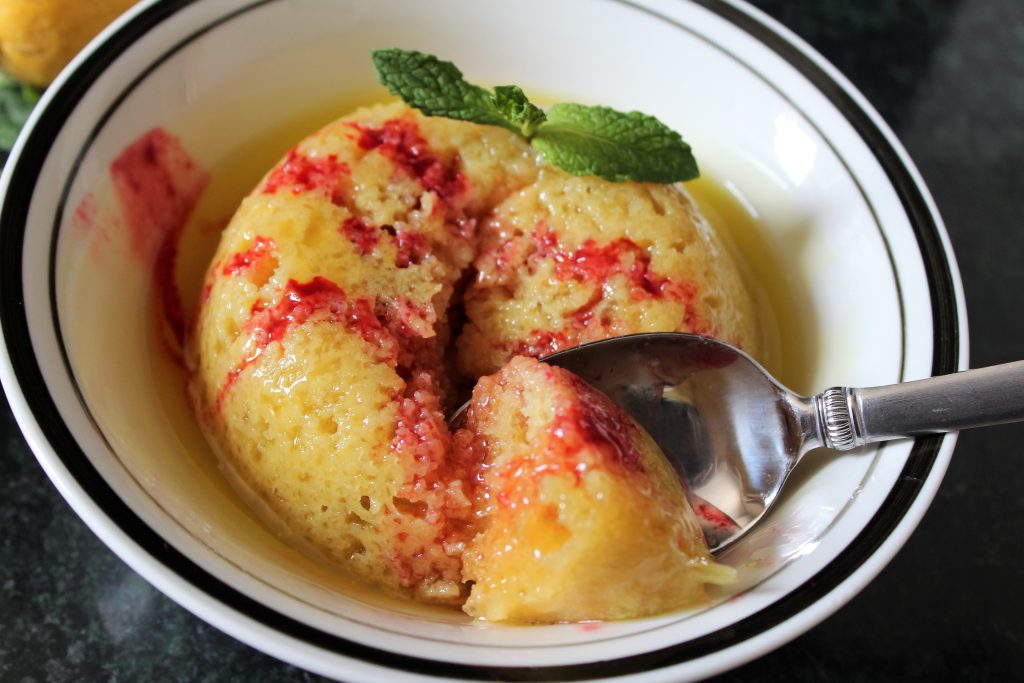
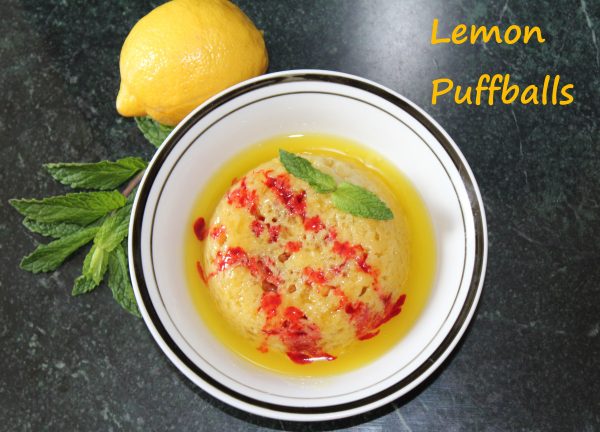
So what is a puffball? It’s nothing mysterious, really. Just a steamed cake, usually served with a warm sauce instead of frosting. The original recipe is a chocolate cake with a vanilla butter sauce. This time, I’ve made a lemon cake with a lemon sauce. I added a drizzle of raspberry sauce as well, but that’s completely optional.

You really could do this with any variety of citrus. And feel free to use a sauce of your choice, or just a dusting a powdered sugar and a dollop of whipped cream. Chocolate sauce would be great on an orange cake. Or you could just use extra milk in place of the lemon juice (and remove the baking soda) for a vanilla cake and top with citrus sauce or hot fudge.

This is a great recipe for beginner bakers. It is a simple, one-bowl cake recipe that doesn’t require an electric mixer.  However, you do need some ramekins or Pyrex bowls and a steamer. I use four 10-oz Pyrex bowls, but you can use up to six bowls or ramekins, as small as a 5-oz size. Just make sure they are heat-safe. I have large pasta pot with a steamer insert that I use, but you can use any steamer you have, or make your own with a large soup or stock pot.

The cake is fairly light, in both flavor and texture. Which is why I highly recommend adding the sauce to it. The sauce soaks up into the cake to make it extra moist and flavorful. If you’ve never had a puff ball cake before, you definitely need to give these a try. 


Print Recipe
Lemon Puff Balls
Servings
Ingredients
Puff Balls
Lemon Sauce
Servings
Ingredients
Puff Balls
Lemon Sauce
Instructions
Puff Balls
  1. Combine all ingredients in a medium bowl and wisk until combined.
  2. Pour into 4 to 6 greased ramekins or Pyrex bowls (5 to 10 oz each).
  3. Steam cakes in a steamer for 20-30 minutes or until a toothpick inserted in the middle comes out clean.
Lemon Sauce
  1. Combine sugar, cornstarch, and water in a small saucepan and cook over medium heat until thickened and clear.
  2. Add remaining ingredients and stir until butter is melted.
  3. Serve warm over puff balls.
Recipe Notes

A drizzle of raspberry sauce adds a nice pop to the lemon cake.

Use any citrus you'd like for both the cake and the sauce. Or omit the citrus sauce and top with warm hot fudge sauce on an orange puff ball.

You can also top with whipped cream or ice cream.

Share this Recipe

Mud Pie for Grandpa

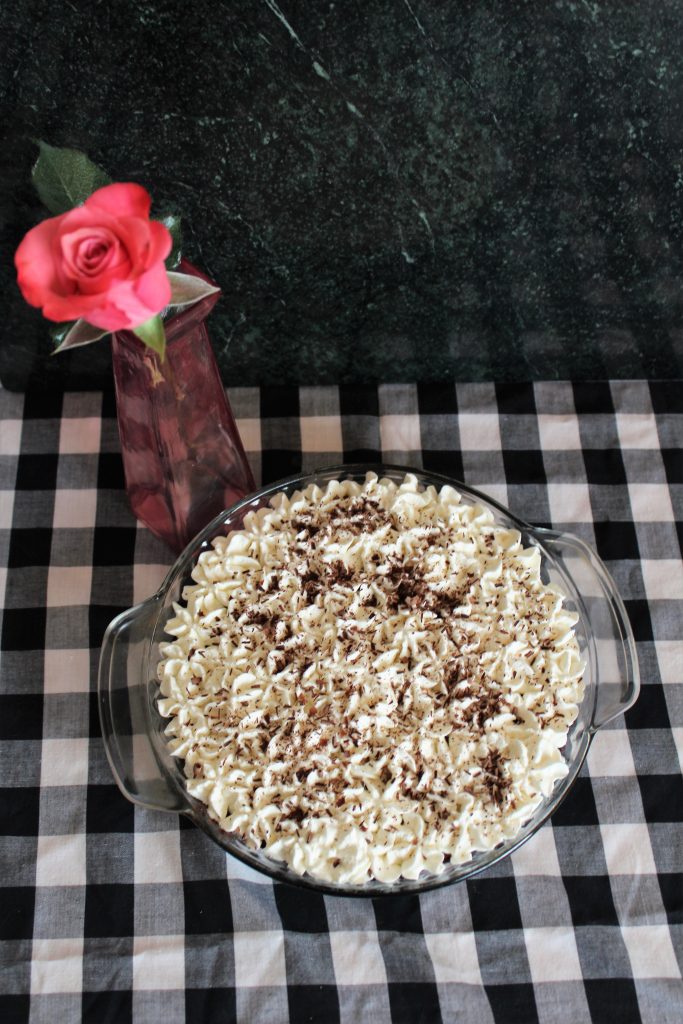
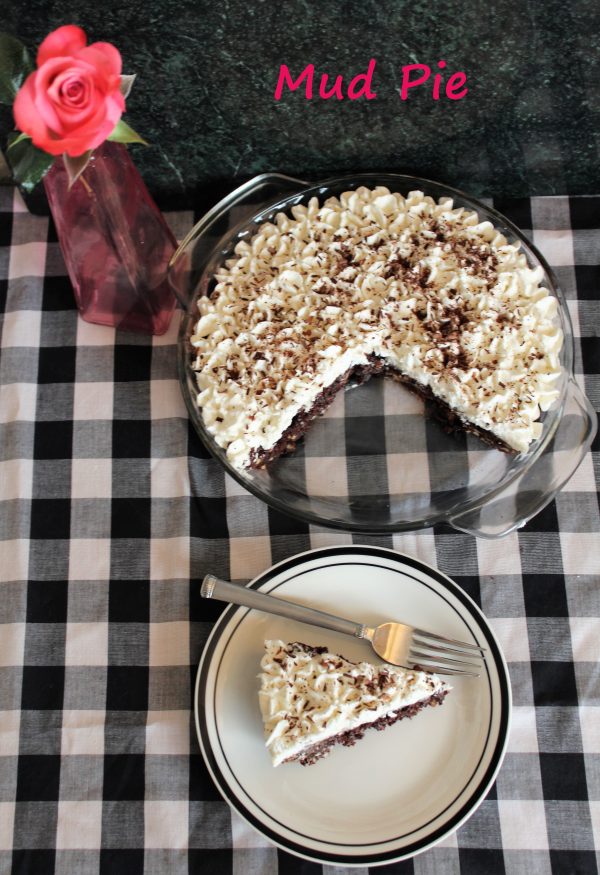
I am a long-time collector of recipes. Cookbooks, magazines, recipe cards – I love them all. For years I copied or clipped recipes from all of the above, and I keep them in a set of binders. More recipes than I’ll ever get around to making. As I was looking through those binders looking for inspiration, I came across an old recipe for Mud Pie. It came out of a children’s cookbook, Alpha Bakery by Gold Medal Flour.

Sometime in roughly the mid-90’s, I made this recipe for a family dinner. I don’t remember the exact occasion, but my grandparents, and maybe others, had come to dinner. Anyway, I made the mud pie and we all thought it was delicious. Several months or maybe even a year later, my grandfather asked about the dessert. He wanted me to make it again. He described it as a brownie or cake with whipped cream on it. Well, neither my mom nor I, or anyone else, could remember such a recipe. (I know – that really makes you want to try a recipe we couldn’t remember a relatively short time later.) He continued to talk about it on occasion, and how much he liked it. But we just could not figure out what that recipe was.

My grandpa passed away in 2006, and I still hadn’t figured out what dessert he was remembering. Fast forward several years, when my parents were moving into their current house and I was helping them to pack up. I was looking through all of my mom’s cookbooks while packing them when I came across the Alpha Bakery cookbook. I flipped through it to see if there were any recipes worth saving, and as soon as I saw the Mud Pie recipe I knew that was recipe Grandpa kept asking about. I copied it then and put it into my binder, to be forgotten again until this past weekend. Since his 95th birthday would have been later this week, I knew it was time to make it again.

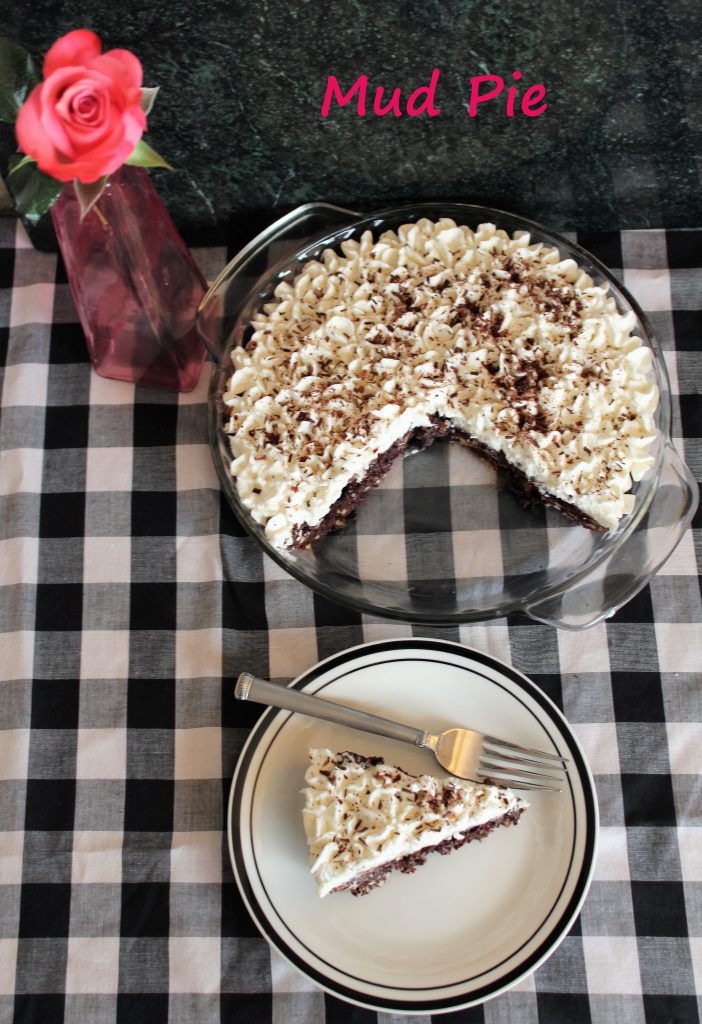
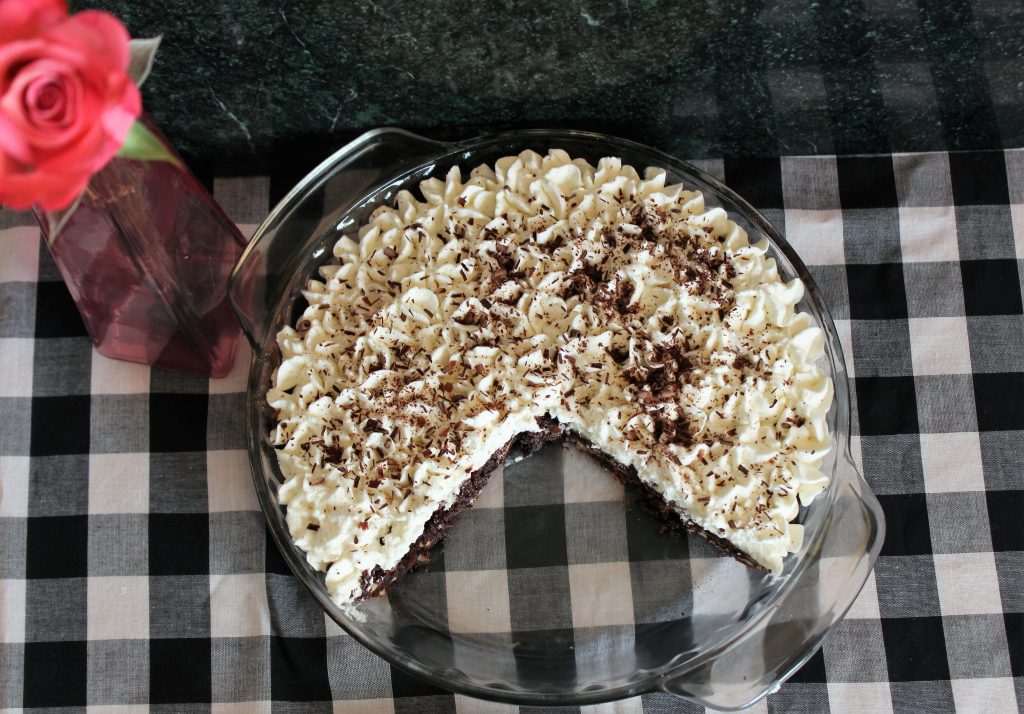
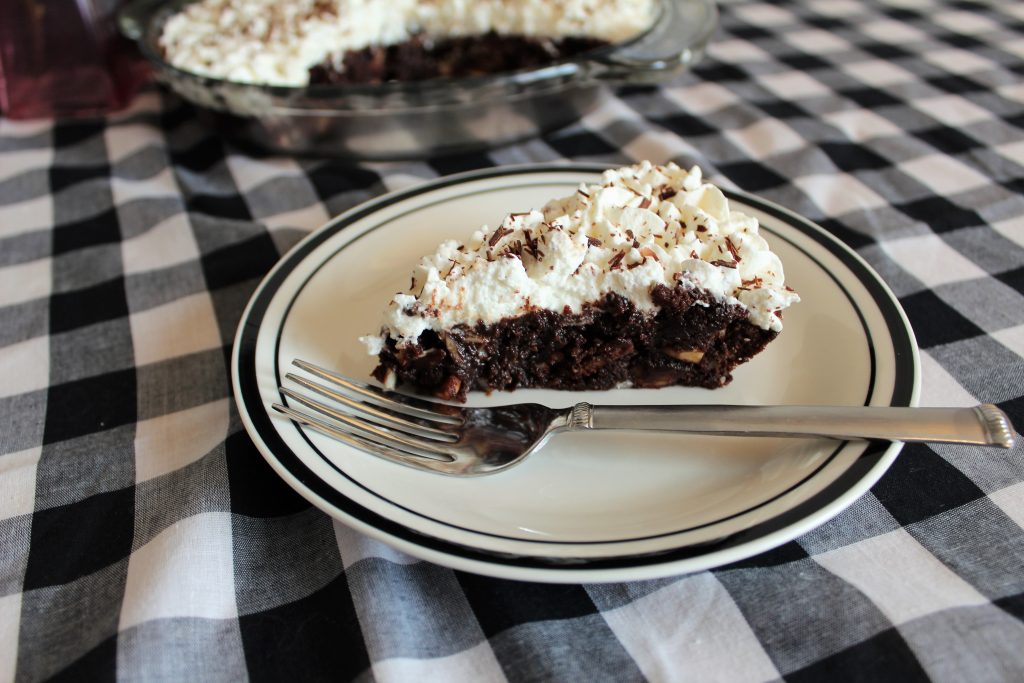
The base is a rich brownie with chopped nuts. I used slivered almonds because I had some on hand. But you can of course use the nuts of your choice, or leave them out. Replace them with chocolate chips (any flavor) if you’d like. You top the brownie with hot fudge sauce. I used a homemade sauce, but you can definitely use a jarred sauce – fudge sauce, not chocolate syrup. I also think this would be delicious with a caramel sauce instead. Then top it all with whipped cream. I used a stabilized whipped cream, since I knew we wouldn’t eat it all at once. You could use regular whipped cream if you have enough people to serve that there won’t be leftovers. Or Cool Whip works too. But if you are making your own whipped cream, consider playing around with the flavors. Personally, I think a little almond extract in it would be perfect. But strawberry or cherry extract and a little red or pink food coloring would be delicious. Or peppermint extract and green food color for a grasshopper type of pie. The possibilities are endless.

Happy Birthday Grandpa!

Print Recipe
Mud Pie
A dense, fudgy brownie topped with hot fudge sauce and whipped cream. Lightly adapted from Gold Medal Flour's Alpha Bakery
Course Dessert
Servings
Ingredients
Brownie Base
Whipped Cream
Course Dessert
Servings
Ingredients
Brownie Base
Whipped Cream
Instructions
Brownie Base
  1. Heat oven to 325 degrees F and grease an 8-inch cake pan or pie plate.
  2. Mix butter, sugar, eggs, vanilla, and salt in a medium bowl.
  3. Stir in flour, cocoa powder, and nuts.
  4. Pour into prepared pan and bake for 25-35 minutes or until a toothpick inserted halfway between the center and the edge comes out clean. Time will depend partly on the size of your pan.
  5. As soon as the brownie comes out of the oven, poke it all over with a skewer or fork. Spread the fudge sauce over the brownie and let cool completely.
Whipped Cream
  1. For stabilized whipped cream, combine gelatin and water in a small saucepan and let sit until thick.
  2. Melt gelatin over low heat, stirring constantly. Once melted, remove from heat and cool slightly.
  3. While gelatin cools, whip cream and powdered sugar until soft peaks form. Add vanilla. (At this point, for regular whipped cream, whip a little longer until stiff peaks and use immediately.)
  4. Beating slowly, gradually add the cooled gelatin mixture to the whipped cream. It will start to look a little curdled, but beat at low to medium speed just until combine and peaks are stiff.
  5. Spread or pipe onto cooled brownie base.
  6. Serve with shaved chocolate or additional hot fudge sauce.
  7. Store in refrigerator.
Recipe Notes
  • Use any nuts you like, or substitute with any flavor of chocolate chips.
  • Jarred or homemade hot fudge sauce works great. Experiment with flavors. Try caramel sauce, or chocolate-mint fudge sauce instead.
  • Use Cool Whip in place of whipped cream.
  • Or flavor your whipped cream with any extract you like. Enhance with food color if desired. Think mint, strawberry, etc.
Share this Recipe

Cherry Chocolate Chip Sweet Rolls

Hi everyone! I have something really exciting to share with you today! Oh – and I made you Cherry Chocolate Chip Sweet Rolls. 🙂

So I’ve been back down in Oklahoma, but this time I’ve been in Ponca City, which just happens to be the next town over from Pawhuska. Now, if you read many food blogs, or watch Food Network, you may recognize that name. That’s because it’s where Pioneer Woman lives, and where her Mercantile is located. Well, I was fortunate enough to get to go visit the Mercantile and eat dinner there! The store is really amazing, and the food was fantastic. I bought a cookbook and a few bowls, and then spent too much money at the bakery. 🙂 And dinner was worth the wait (the line was out the door when we first got there!). I had the grilled cheese, and others I went with tried the ribeye reuben, the chicken fried steak, and the fried chicken sandwich. They are all highly recommended by us!

That was exciting enough, but what made the day even better was that the lodge, the guesthouse on their ranch where Ree films her Food Network show, was open for tours that day, and I managed to get there just before they closed! It was really cool to visit both her “studio” and the Mercantile. The Pioneer Woman is one of the most successful and well-known food blogs, so for a new blogger it was a real treat. I definitely recommend stopping at the Mercantile if you ever find yourself anywhere near Pawhuska!

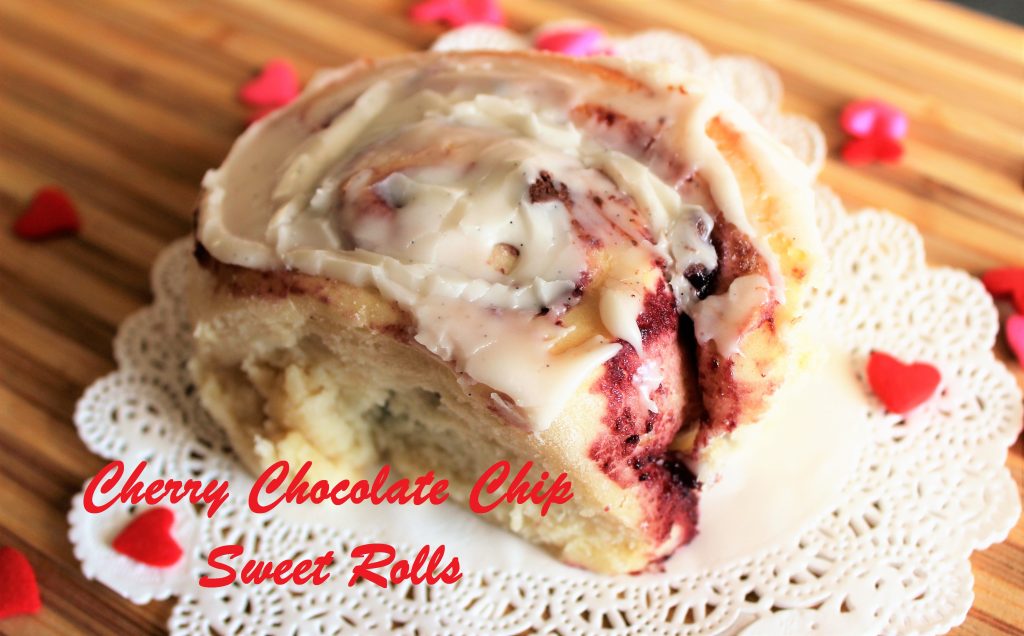
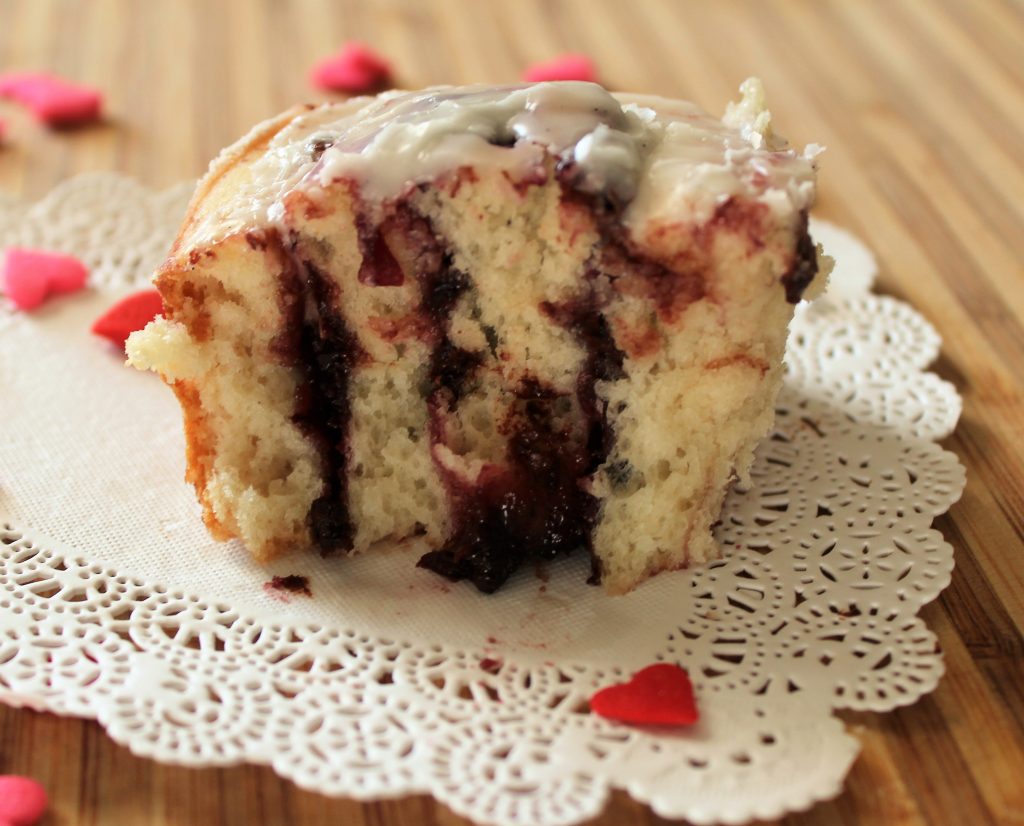
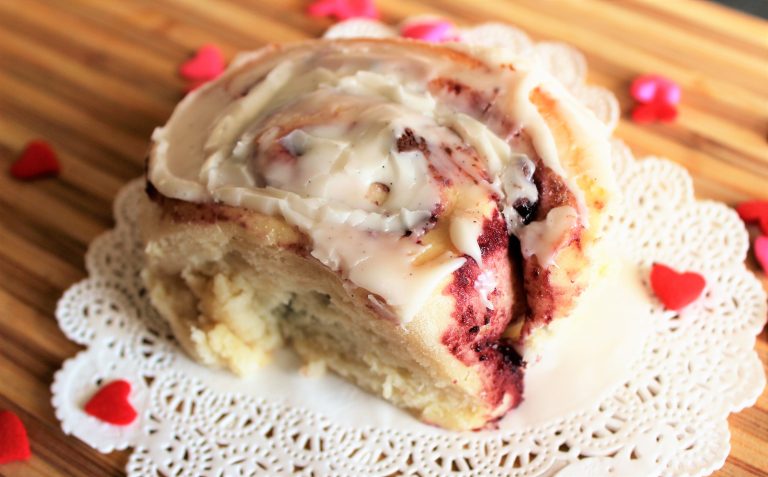
Anyway, let’s get back to these sweet rolls. They are somewhat inspired by Pioneer Woman, since I tried her cinnamon rolls at the bakery (too die for!!), and in the cookbook I bought she has a recipe for Raspberry Cream Cheese Sweet Rolls.  I was really craving some kind of sweet roll, and with Valentine’s day coming up, chocolate and cherry seemed to be an appropriate combination. 🙂

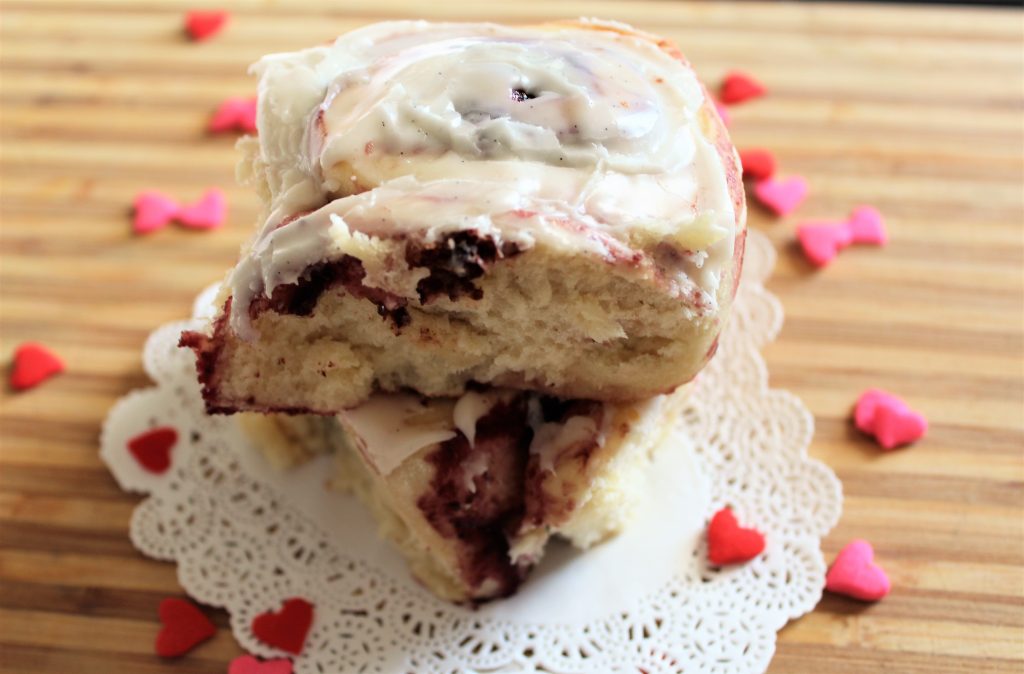
These start with a cherry curd, which is really simple to make. You just need frozen cherries, sugar, butter, egg yolks, and corn starch. The recipe makes about 2 cups, and you only need 1/2 cup for this recipe, so there is plenty left over. Spread it on toast, biscuits, pancakes, ice cream, pork chops….well, pretty much anything! You can also substitute any frozen berries in this recipe, and it would be just as delicious.

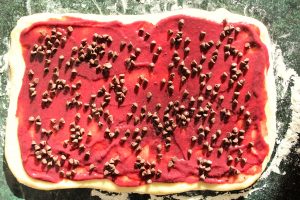
The filling is just the curd and chocolate chips, but there is so much room for adjustments! Prefer lemon curd? Go for it. Or want them even faster? Use a store-bought jam. Leave out the chocolate chips, or change up the flavor (white chocolate with the lemon curd would be perfect). Add nuts with the chips or in place of them. The possibilities are endless!

This recipe is scaled to make 6 rolls, but can easily be doubled to make a dozen in a 9×13-inch pan.

Oh, and did I mention these come together in about an hour, if you already have the curd made? That’s right – you are only an hour away from warm, chocolatey, sweet-tart cherry sweet rolls!


Print Recipe
Cherry Chocolate Chip Sweet Rolls
Course Breakfast
Prep Time 40 minutes
Cook Time 20 minutes
Servings
rolls
Ingredients
Course Breakfast
Prep Time 40 minutes
Cook Time 20 minutes
Servings
rolls
Ingredients
Instructions
  1. Combine 1 cup flour and the yeast in a large bowl, or the bowl of a stand mixer.
  2. Combine milk, water, sugar, oil, and salt in a microwave safe bowl. Microwave for 30 seconds at a time, stirring after each, until mixture is slightly warm, about 1 minute.
  3. Add the milk mixture to the flour and yeast along with the egg yolk. Beat with an electric mixer, or by hand, for 30 seconds or until combined. Scrape bowl, and beat at medium speed for 3 minutes.
  4. Either by hand or with a dough hook, add in the second cup of flour and mix until a soft dough forms. Knead, by hand or with the dough hook, for 3 to 5 minutes, adding up to an additional 1/4 cup of flour, until dough is smooth and elastic. It will be a very soft dough, and should be very slightly sticky. Cover and let rest for 10 minutes.
  5. Turn dough out onto a lightly floured surface and roll into a 7x12-inch rectangle. Spread cherry curd over dough, then sprinkle with chocolate chips. Beginning from the short (7-inch) side, roll up jelly-roll style. (If doubling, roll a 14x12-inch rectangle and roll from the long side.)
  6. Slice into 6 rolls and place, cut side up, into a greased 8-inch square pan. Cover and let rise until nearly doubled, about 20 minutes.
  7. Bake in a 375-degree F oven for 15 to 20 minutes or until golden brown. Cool slightly before topping with the powdered sugar glaze and serving. Store, covered, at room temperature for 2 to 3 days.
Recipe Notes

Cherry curd recipe here.

Powdered sugar glaze recipe here.

Recipe can be doubled to make 12 rolls in a 9x13-inch pan.

Substitute any curd or jam.

Substitute any flavor chocolate chips.

Add 1/4 cup chopped nuts instead of or in addition to the chocolate chips.

Flavor the powdered sugar glaze with extracts.


Share this Recipe