Archives

Cookies and Coffee Cheesecake

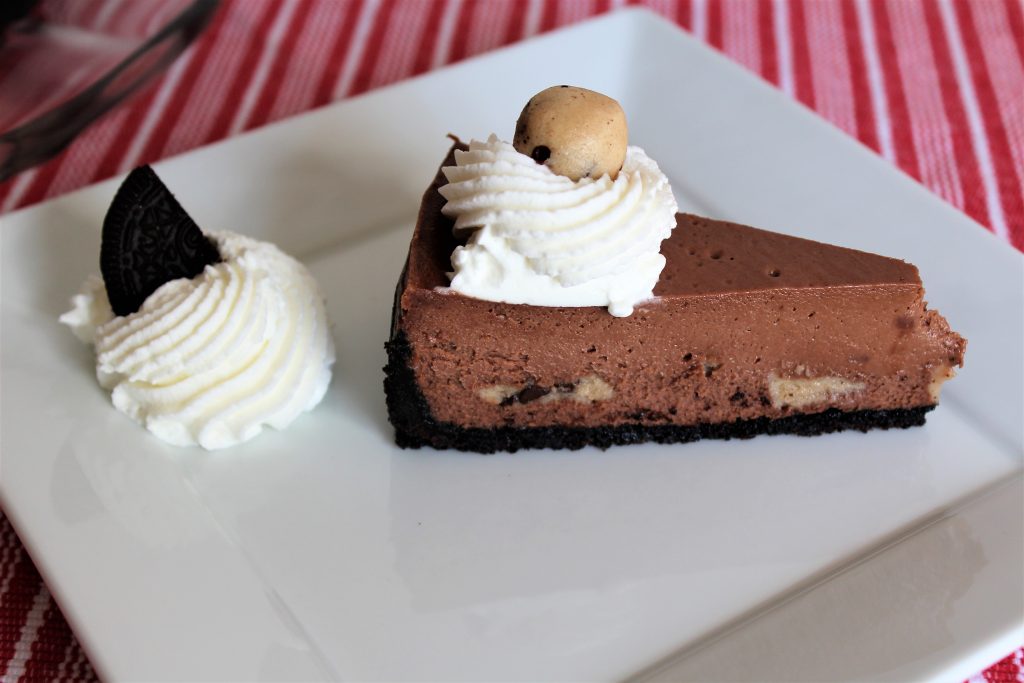
A rich mocha cheesecake with Oreo crust and cookie dough throughout! It’s a spin on my favorite flavor of ice cream.

Do you have Turkey Hill ice cream where you live? If you do, have you tried their Double Dunker flavor? They describe it as “mocha ice cream swirled with cookie dough and crunchy chocolate cookie swirl”. I describe it as perfect. They only just recently started carrying it in stores here in Kansas City, so I was driving 2 hours to the nearest store to get it. Yes, really. It’s that good. If it’s in stores near you, go get some right now. It’s ok – I’ll wait.

For those of you who don’t have this flavor available near you, or who don’t want to run right out to the store, I turned it into a cheesecake! I started with an Oreo crust to mimic the cookie swirl. Then there are the cookie dough pieces embedded in the mocha cheesecake. Somehow they all work sooo good together.
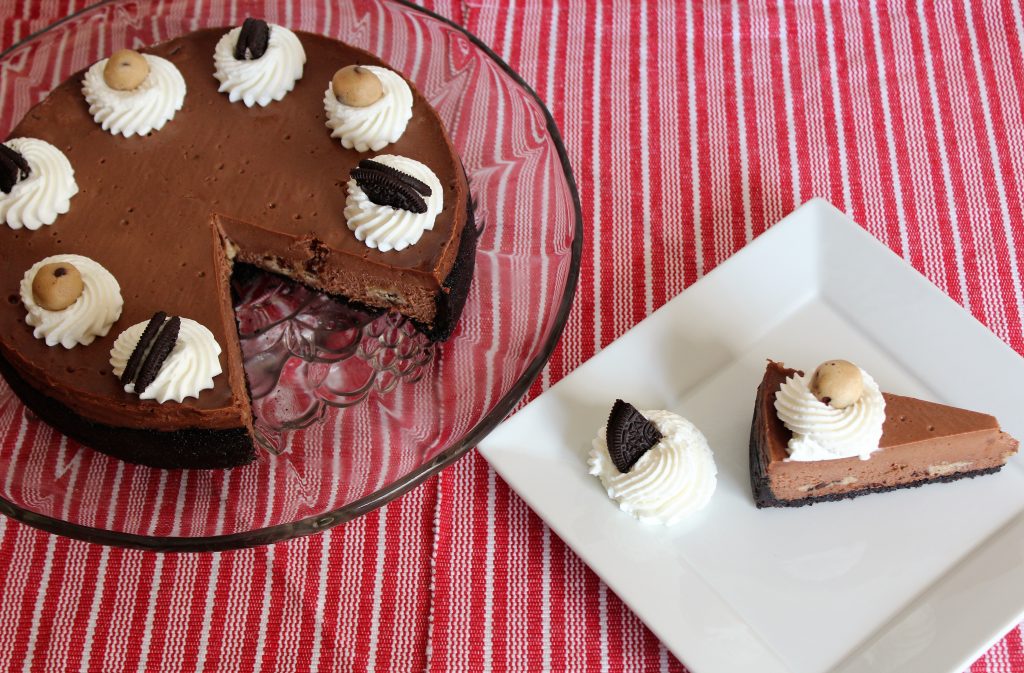
 

Yes, there are a lot of steps in this. Yes, it is worth it. It’s probably not something you’ll make for a simple weeknight dessert, but it would be great for a party or other get together. It can easily serve 12, so there is plenty to go around. Plus, you can make it over several days so there is no last minute rush. 

I like to toast the flour in the cookie dough since I keep a bit to top it with that is completely uncooked. You don’t have to do this, but since there is a chance that raw flour can contain E. Coli, I usually do if I am serving it to guests. I cook the cheesecake at a low temperature, so there is no need for a water bath. And I don’t really like springform pans, so I use Alton Brown’s method and bake it in a regular cake pan. Yes, it does come out. Promise. You can use a springform if you prefer.

You say you don’t like coffee? Leave out the coffee for a straight chocolate cheesecake. Don’t want to make the cookie dough (or not a fan of raw dough), then use chopped chocolate chip cookies instead. And if you want a cookies and milk cake instead, use your favorite vanilla cheesecake batter with the Oreo crust and cookie dough pieces. However you make it, make this soon. And make sure to try the ice cream too!

Print Recipe
Cookies and Coffee Cheesecake
A rich mocha cheesecake with an Oreo crust and cookie dough pieces.
Servings
people
Ingredients
Crust
Servings
people
Ingredients
Crust
Instructions
Crust
  1. Place cookies in a food processor and pulse until it reaches fine crumbs.
  2. Add melted butter and pulse until combined.
  3. Line a 9"x2" cake pan with parchment paper on the bottom (with a round) and the sides (with a strip). Use baking spray below the parchment to keep it in place, and spray parchment with baking spray before adding crust. You may also use a 9" springform pan. Use only a parchment round on the bottom and spray with baking spray.
  4. Press crumbs onto the bottom and 1" up the sides of the pan.
  5. Bake at 300 degrees F for 10 minutes. Cool.
Filling
  1. Combine chocolate chips, cream, and instant coffee granules in a microwave safe bowl and microwave for 40 seconds, stirring halfway through. If chips are not fully melted, microwave additional 10 seconds. Set aside.
  2. Beat cream cheese and sugar with a mixer until smooth.
  3. Add cocoa powder and beat until combined.
  4. Add eggs, one at a time, beating well after each addition.
  5. Add the vanilla and reserved chocolate-coffee mixture and mix until combined.
  6. Pour mixture into cooled crust.
  7. Remove cookie dough from refrigerator or freezer and slice into 1/2-inch pieces. Press pieces into cheesecake filling, distributing evenly and making sure all cookie dough is covered by the cheesecake batter.
  8. Bake cheesecake at 250-degrees F (no water bath needed!), for 1 hour 15 minutes to 1 hour 30 minutes. Cheesecake is done when the center 4 inches is still slightly wobbly. The chocolate will ensure it sets completely once cooled.
  9. Cool cheesecake until near room temperature and then refrigerate at least 8 hours or overnight,
  10. To remove from cake pan, fill sink with about 1/2-inch of very hot tap water. Set pan into water for 1 minute. The strip of parchment around edge of pan should slide out. Slide a knife around the edge after removing paper to assure everything is released from the sides. Place a piece of parchment paper on top of the cheesecake, and turn it over onto a large plate or extra serving platter. Cheesecake should release from the bottom and fall onto the plate. If it does not, return to hot water for additional 30 seconds. Remove parchment from bottom of cheesecake and invert onto final serving platter.
Recipe Notes
  • You can omit the coffee if you prefer a regular chocolate flavor.
  • Use store-bought or homemade chocolate chip cookies instead of the cookie dough.
  • For a cookies and milk cake, use your favorite vanilla cheesecake batter with the Oreo crust and cookie dough filling.
Share this Recipe
 

Ice Cream Slab Pie

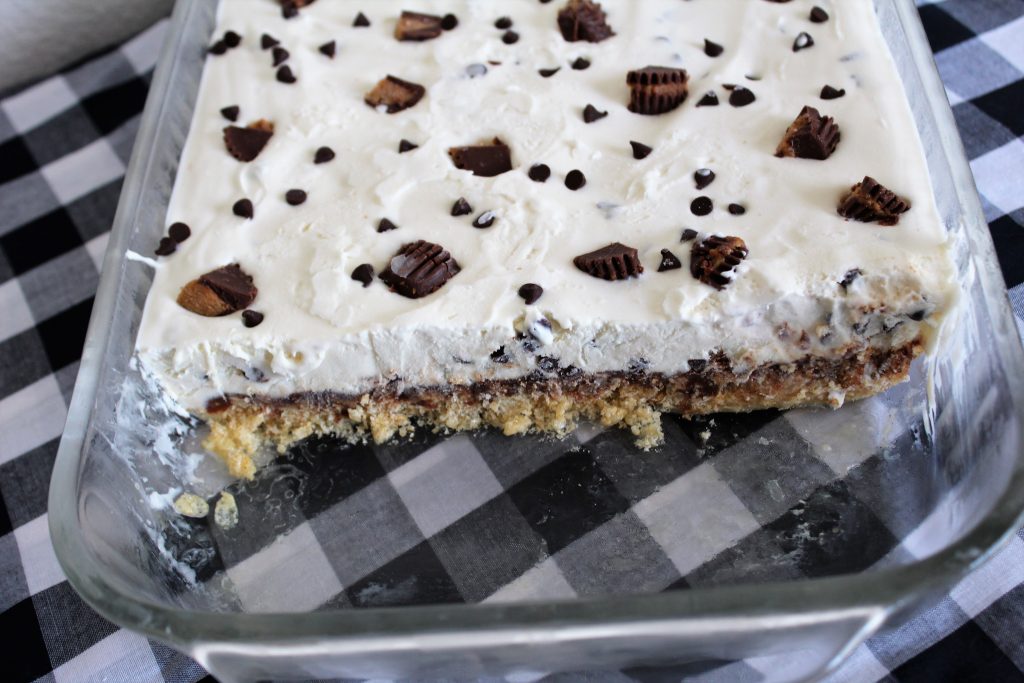
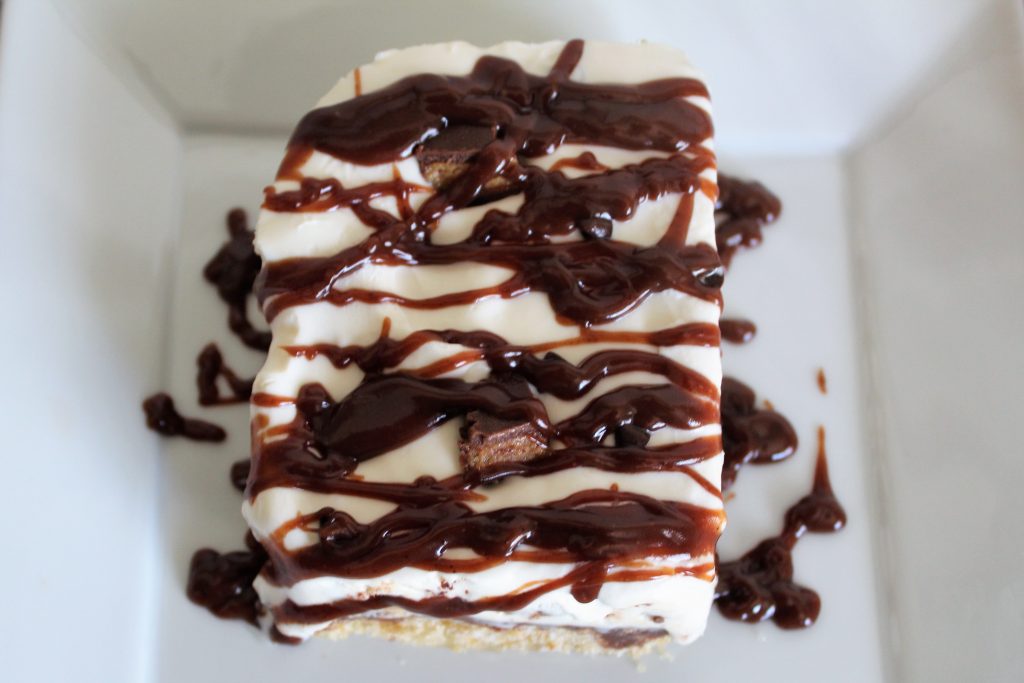
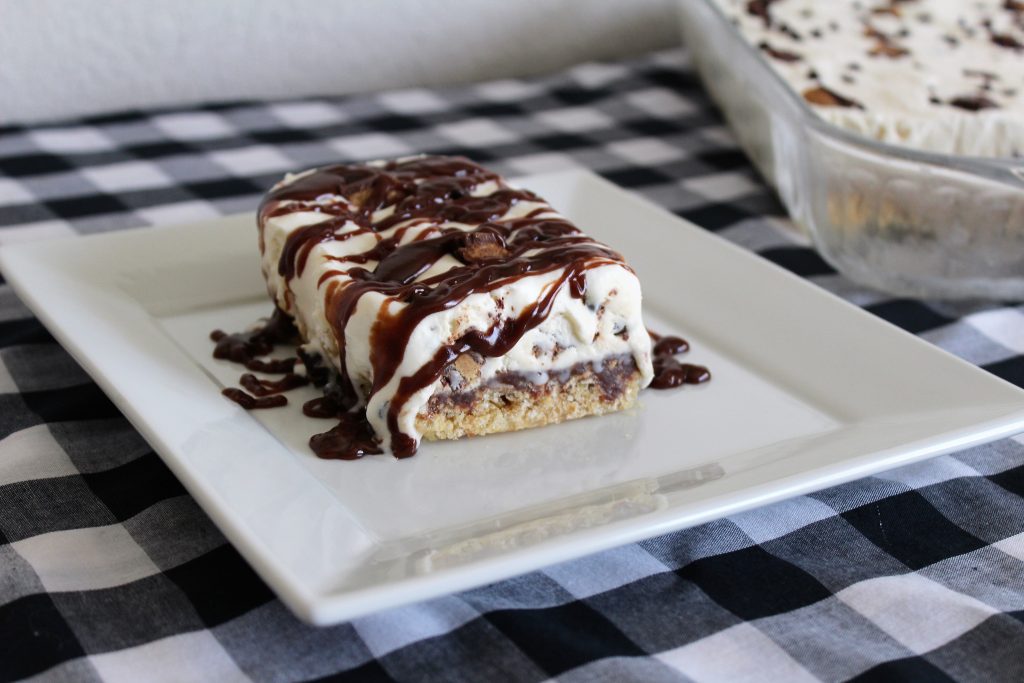
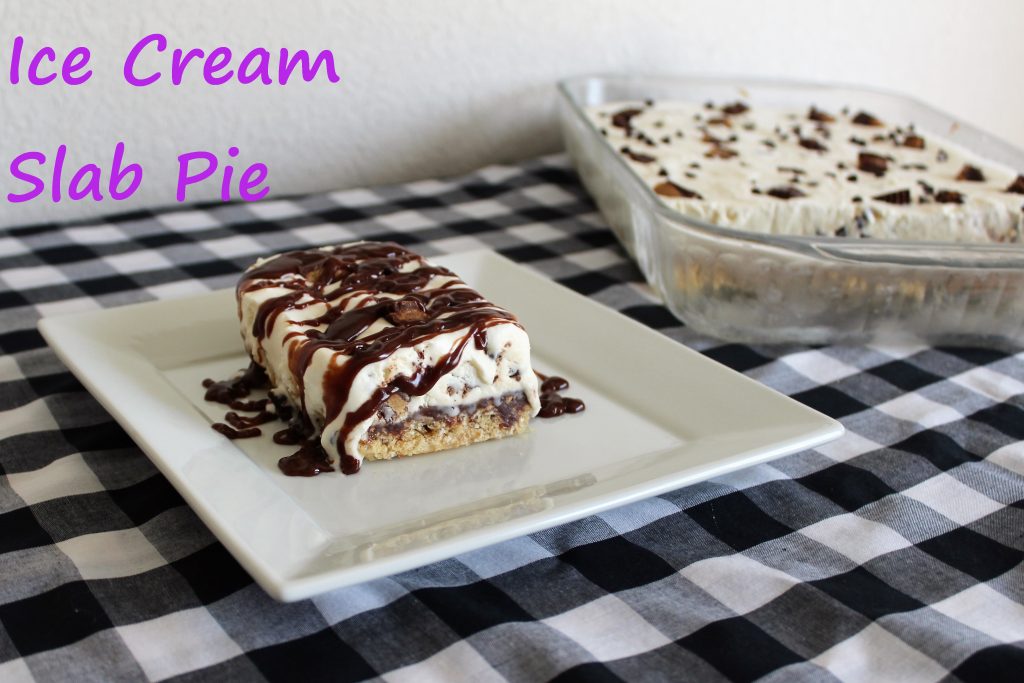
Who’s ready for ice cream? Or better yet, ice cream slab pie! This one has a rice crispy crust, peanut butter fudge sauce, and homemade no-churn ice cream with chocolate chips and peanut butter cups. It’s a twist on a favorite dessert my mom used to make in the summertime.

It sounds like a lot of components, but each of them are so easy. And there are so many options – not only to change up the flavors, but you can easily swap in store-bought parts too. You can make this as homemade or store-bought as you’d like.

Let’s start with the base. My recipe begins with a simple rice crispy base. But you could just as easily bake up a batch of brownies, or use a roll of cookie dough pressed into a pan and baked. Even a graham cracker crust would work.

The sauce starts with a homemade hot fudge that is combined with peanut butter. You could leave out the peanut butter and extra corn syrup (just use the whole batch of hot fudge instead). Or start with a bottled hot fudge sauce. You can also mix up the flavors. Use a caramel or butterscotch sauce instead. Or use a different nut butter, Nutella, or even cookie butter!

The ice cream is a very simple no churn ice cream. I love the no-churn recipe, and it’s endlessly adaptable. Choose the candy mix-ins that you prefer, or use crushed cookies (like Oreo’s!). You could also use a store-bought ice cream in whatever flavor you prefer. Just soften it slightly before you scoop it into the crust.

There are so many variations you can make to this recipe. I hope you give it a try, and let me know what flavors you choose!


Print Recipe
Ice Cream Slab Pie
Course Dessert
Servings
Ingredients
Base
Hot Fudge Sauce
Ice Cream
Course Dessert
Servings
Ingredients
Base
Hot Fudge Sauce
Ice Cream
Instructions
Base
  1. Combine first three ingredients in a large saucepan and bring to a boil over medium heat.
  2. Remove from heat and stir in cereal until completely coated.
  3. Press evenly into a greased 13"x9" baking pan. Line with parchment or waxed paper if preferred for easier serving.
Sauce
  1. Melt chocolate in a small saucepan over low heat.
  2. Once melted, add evaporated milk, sugar, cocoa powder, 1/4 cup corn syrup, salt, and vanilla. Cook over medium-low heat until thickened, about 5 to 8 minutes. The mixture should not quite come to a simmer.
  3. Remove 2/3 cup hot fudge sauce and combine with peanut butter and remaining corn syrup. Save remaining hot fudge sauce for another use (store air tight in refrigerator).
  4. Spread half of peanut butter fudge sauce onto the base and place in freezer.
Ice Cream
  1. Whip cream until soft peaks form.
  2. Gently fold in sweetened condensed milk and vanilla until combined.
  3. Chop 12 of the peanut butter cups and fold into ice cream mixture with all but 2 tablespoons of the chocolate chips.
  4. Spread ice cream mixture onto prepared base and sprinkle with remaining chips and the other 6 peanut butter cups, chopped.
  5. Freeze for at least 6 hours or overnight.
  6. Serve with warmed remaining peanut butter fudge sauce drizzled over each serving.
  7. Store leftovers in the freezer, and extra sauce in the refrigerator.
Recipe Notes
  • Use any crust you'd like - brownies, baked cookie dough, graham cracker crust.  Mix it up with different flavors!
  • Use 2/3 cup bottled hot fudge sauce if desired. Or double the amount and leave out the peanut butter.
  • Use any flavor sauce you'd like - try butterscotch or caramel!
  • Substitute any nut butter, or even Nutella. Cookie butter would be delicious too.
  • Use any mix-ins you prefer - try different candies, or crushed cookies. Your imagination is the limit! Use 1 to 2 cups total.
  • You can also use softened, store bought ice cream in any flavor to fill the crust (6 cups/ 48 oz tub).
Share this Recipe

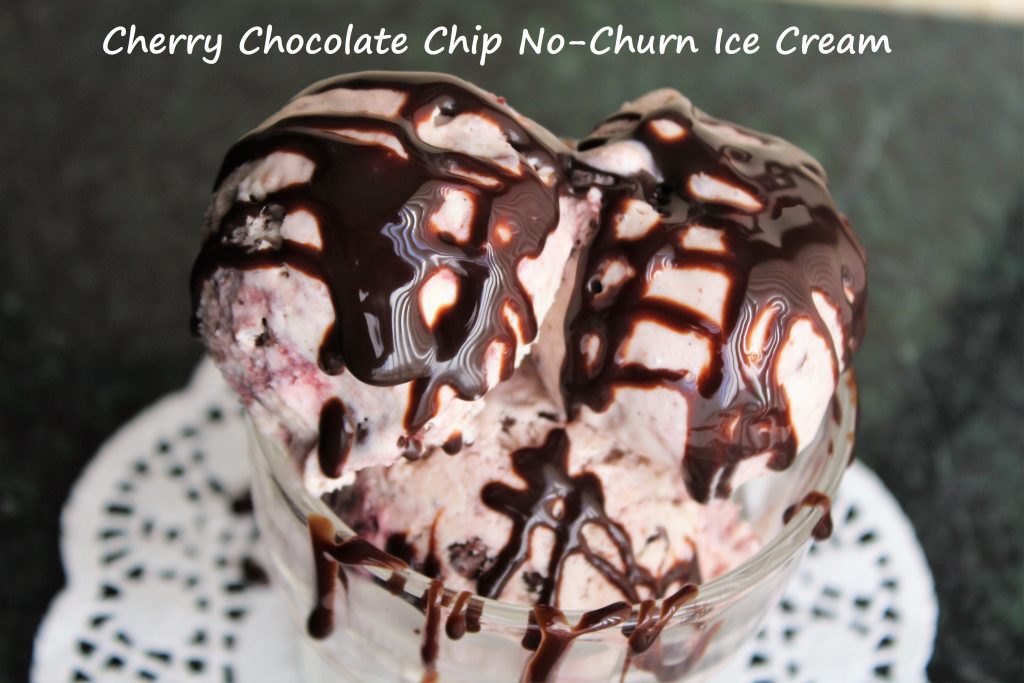
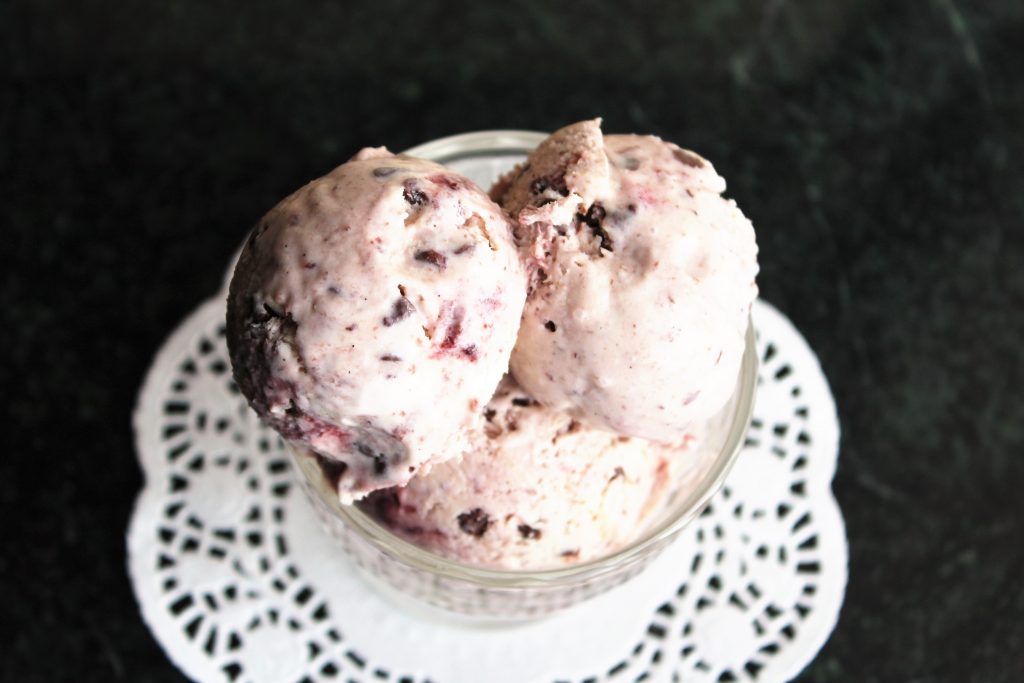
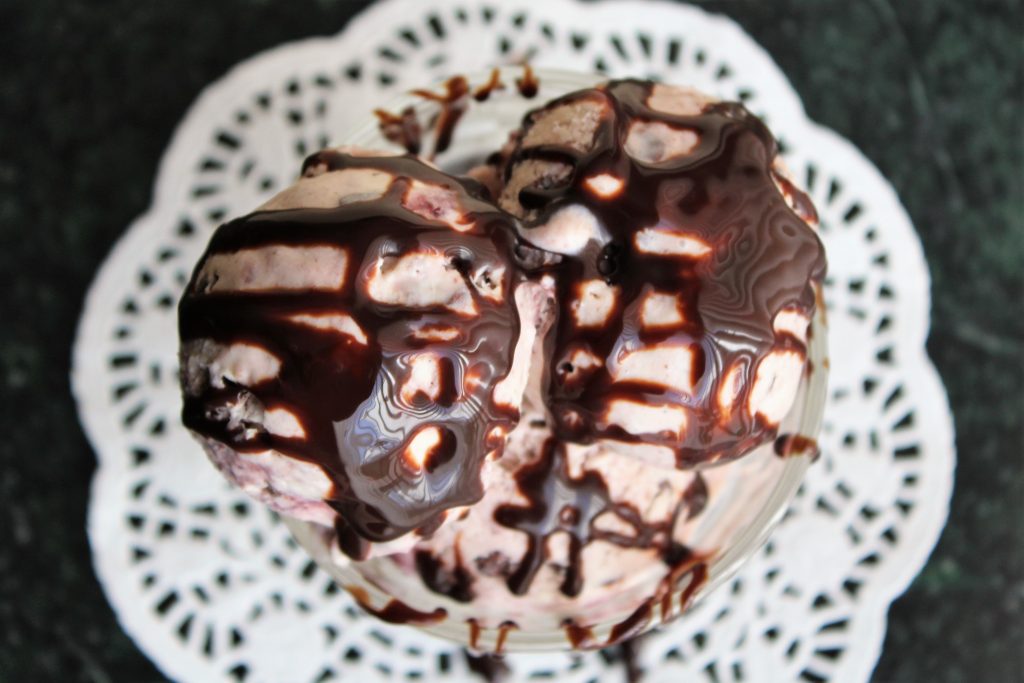
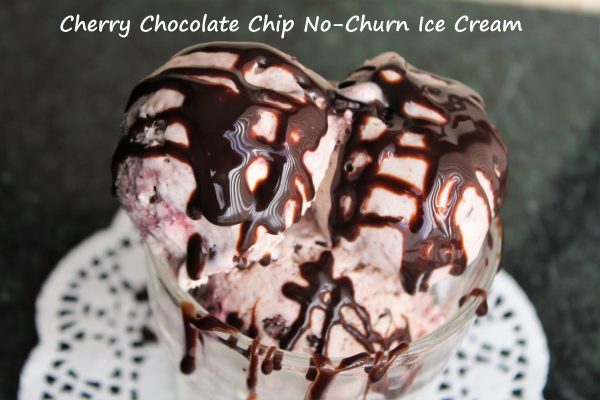
Cherry Chocolate Chip No-Churn Ice Cream

Is it warm enough for ice cream where you live? It’s been warm off and on here, but the truth is we will eat ice cream all year long. 🙂

Do you remember the cherry curd I made? I mentioned at the time that you could swirl it into ice cream, and that’s exactly what I did with it! I have made a few no-churn ice creams over the years, and I have to say that I love them. I have an ice cream maker as well, and have made traditional ice cream too, but I really do love the simplicity and texture of the no-churn varieties.

It only takes a few ingredients for the base, and it is endlessly customizable. And there is no chill time, then churn time, then freezer time like traditional ice cream. You mix the ingredients together and stick it in the freezer for a few hours to harden. That’s it. Homemade ice cream in six hours or so. You really can’t beat that!

So the base starts with just a can of sweetened condensed milk and heavy cream. Whip the cream to firm peaks and fold it into the condensed milk. For vanilla ice cream, just add some vanilla extract or vanilla bean paste. Or go crazy with your add-ins. Choose any other extract that sounds good to you. Stir in nuts or chocolate pieces, or drizzle in fudge sauce or caramel. Or do like I did and fold in cherry, or any fruit, curd. You can stir in some cocoa powder to the sweetened condensed milk before adding the whipped cream. I made one that called for a melting peanut butter into the condensed milk before adding the whipped cream.

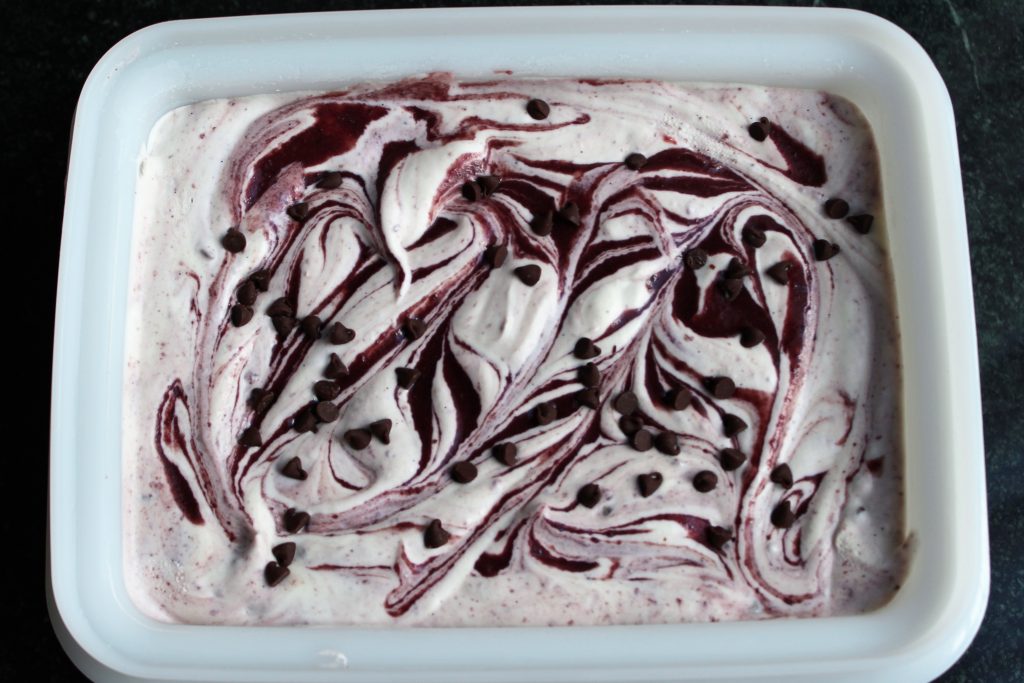
For this particular recipe, I folded about a cup of the cherry curd into the base along with about a half cup of mini chocolate chips. I prefer the mini chips in ice cream because they aren’t as hard to eat when frozen as a larger chip is. I stirred the curd almost completely into the base, but you can leave it as streaky as you’d like. Place the mix into a freezer-safe container, and add a drizzle of curd to the top. Cover tightly and freeze for four to six hours, or until the ice cream is hard.

This no-churn ice cream is so smooth and creamy, I really do prefer it to regular ice cream any more. And it’s so easy to make, there really is no excuse not to try it! 


Print Recipe
Cherry Chocolate Chip No-Churn Ice Cream
Course Dessert
Servings
Course Dessert
Servings
Instructions
  1. Beat the heavy cream with an electric mixer until firm peaks form.
  2. Fold the whipped cream into the condensed milk until almost fully combined.
  3. Fold in the cherry curd and chocolate chips until well distributed or fully incorporated, depending on your preference.
  4. Place into a freezer-safe container and freeze for 4 to 6 hours, or until ice cream is firm.
Recipe Notes

Variations:

Add 2 teaspoons of vanilla or any other extract to the sweetened condensed milk before folding in the whipped cream.

Stir in any nuts or candies of your choice (about 1 to 1 1/2 cups total) after folding in whipped cream.

Melt 2/3 cup peanut butter and mix into the condensed milk before folding in the whipped cream.

Add 1/2 to 3/4 cup cocoa powder to the condensed milk before folding in the whipped cream.

Share this Recipe

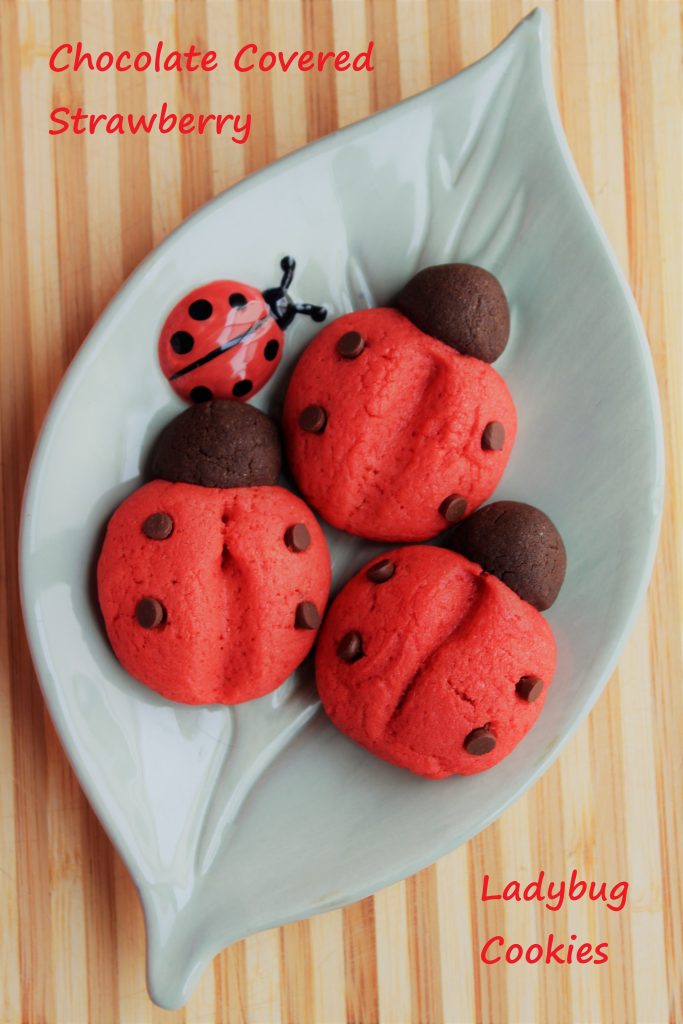
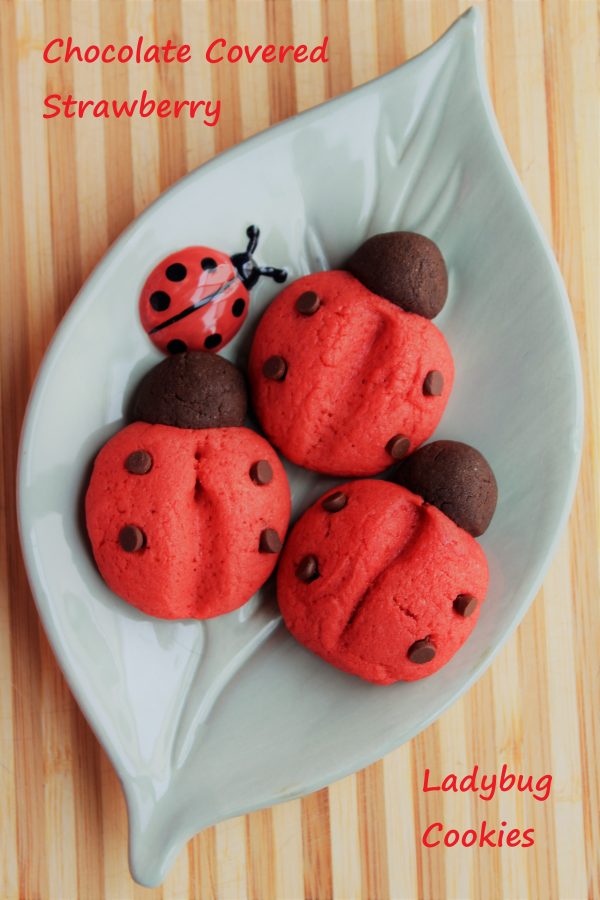
Chocolate Covered Strawberry Ladybug Cookies

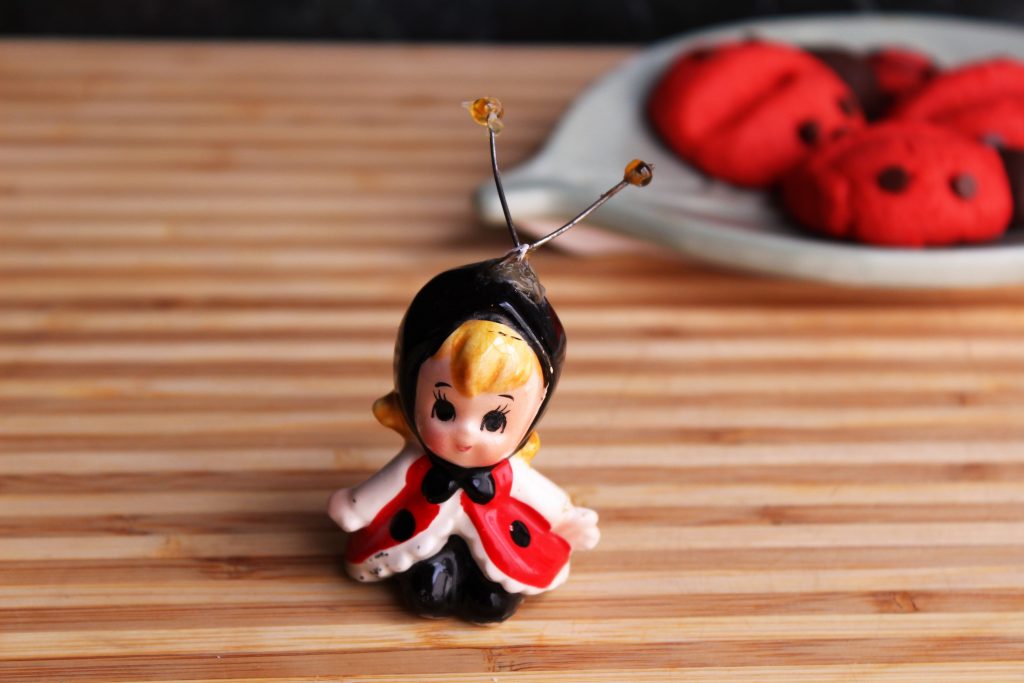
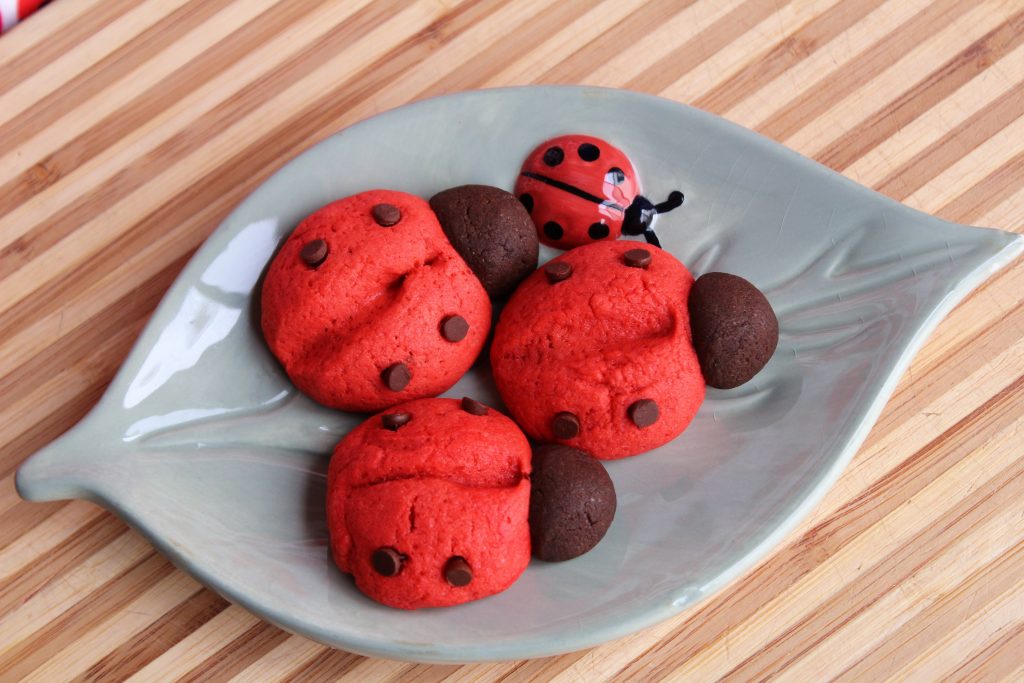
I promised you more spring treats, so here you go! As some of you may know, and many of you probably don’t, I have adored ladybugs my whole life. I have collected ladybugs in any form for as long as I can remember. And I have to tell you, most of the year there aren’t many ladybugs to be found in the stores. My sister collected pandas, and you could find those almost anywhere. I’ve known people who collect pigs or roosters – also pretty easy to find. Ladybugs – not so much. Around Valentine’s Day and Easter you see a few more around, but even then they are pretty scarce. Even so, I have amassed a pretty impressive collection, if I do say so myself. Towels, jewelry, wall art, soap dishes (that one in the picture above – I use it for a spoon rest on my stove!), toys, figurines, etc., etc. But I’m pretty sure it all started with this lovely lady right here.

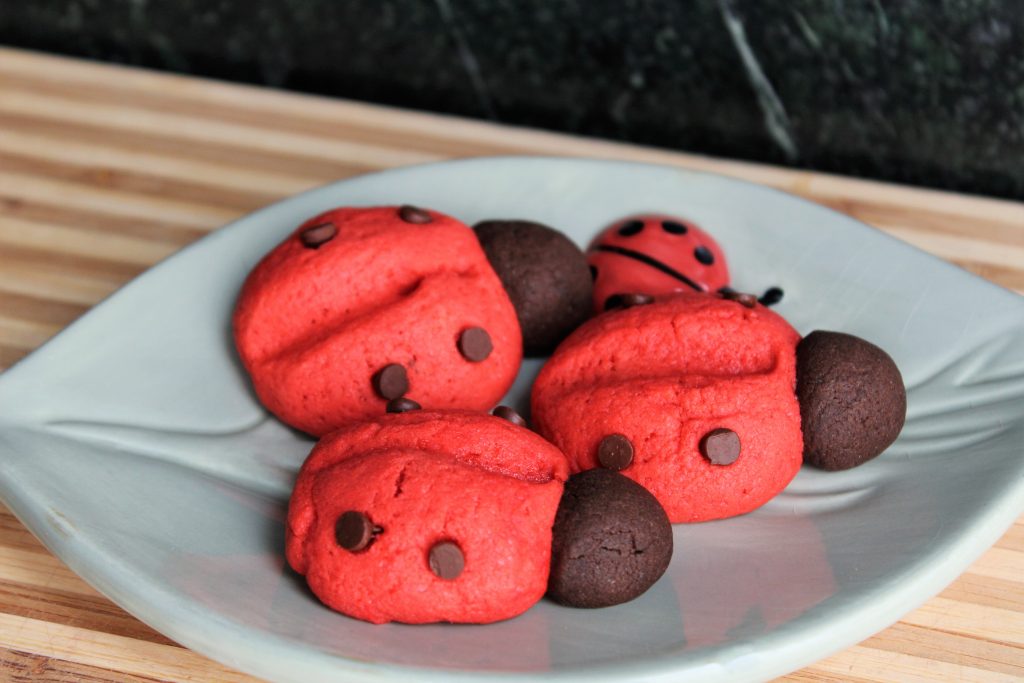
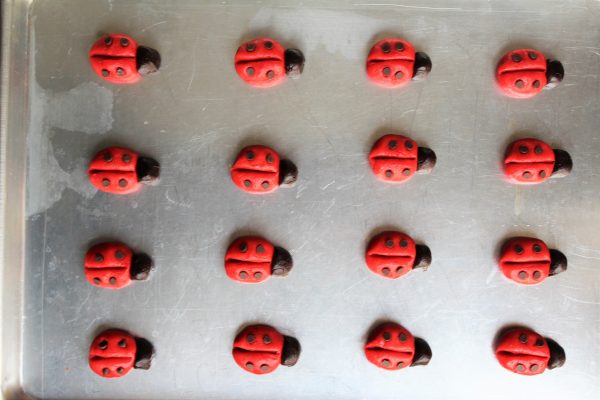
These cookies are an adaptation of a cookie we started making when I was pretty young. My mom had saved a pull-out section of a Good Housekeeping magazine from the 1980s. It was a special Christmas cookie section for “Christmas Toy Cookies”. One of the recipes was for a ladybug cookie. What that has to do with Christmas or toys, I don’t really know. But I do know I loved making and eating those cookies. The original recipe was for a vanilla cookie with maraschino cherry, or red hots, spots. I decided to go more true-to-life, and make a red body with chocolate chip spots. And if I was going to add color, I figured I might as well add flavor!

The recipe as I have written it adds strawberry flavoring, which I’m sure many of you will enjoy. I, on the other hand, do not like strawberries. I know, I know. I told you I was a picky eater. I did have a bottle of pomegranate flavoring in my cabinet, begging to be used, though, and this seemed like the perfect opportunity. You can use either of those flavors, or go with cherry or raspberry. Ooohh, or cinnamon….that would be fantastic, too. You could even leave the flavoring, and the color, out if you wanted to. This is a soft, slightly cakey cookie full of flavor. And they are pretty darn cute, too. 🙂


Print Recipe
Chocolate Covered Strawberry Ladybug Cookies
Servings
cookies
Ingredients
Servings
cookies
Ingredients
Instructions
  1. Cream butter and sugar until light and fluffy. Mix in eggs.
  2. Add salt, baking soda, and flour; mix well.
  3. Remove 1/4 cup of the dough, and stir the melted chocolate into that portion.
  4. Add the extract and food color to the plain dough. I used enough food color to make a bright red, but adjust to your tastes.
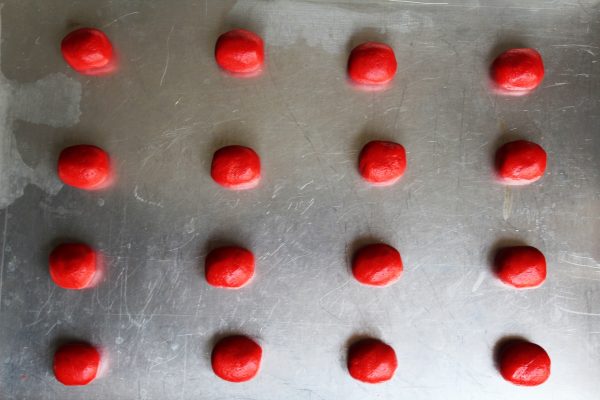
  5. Divide the red dough into 36 pieces, each approximately 1 to 1 1/2 tablespoons. Shape each piece into an oval and place onto ungreased cookie sheets.
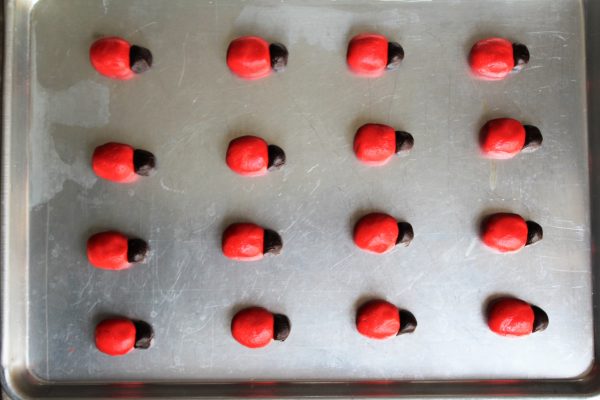
  6. Divide the chocolate dough into 36 pieces, about 1/2 teaspoon each, and push into one end of each oval.
  7. Use the back of a butter knife to make a deep line down the center of each cookie, to define the "wings".
  8. Push mini chocolate chips into each wing. I use 2 or 3 per side, but use as many as you'd like.
  9. Bake at 350 degrees F for 12 to 15 minutes, or until cookies are set. If you don't use the food coloring, there will be very light browning, but you cannot see this on the red cookies.
  10. Cool completely on wire racks and store in an airtight container up to a week.
Recipe Notes

Use any flavor extract, and food coloring, you like. Raspberry, cherry, pomegranate (like I did), even cinnamon would be good if you want to keep them red. Or leave out the extract (use some vanilla),  and food coloring if you prefer.

I used flavoring oil, from LorAnn, which is much more concentrated. If you use those, start with 1/4 teaspoon and slowly add from there. I used about 1/2 teaspoon of the pomegranate flavor.

For an extra hit of chocolate, dip the bottom of cooled cookies into melted dark or milk chocolate and set on waxed paper until chocolate sets.

Share this Recipe

Cherry Chocolate Chip Sweet Rolls

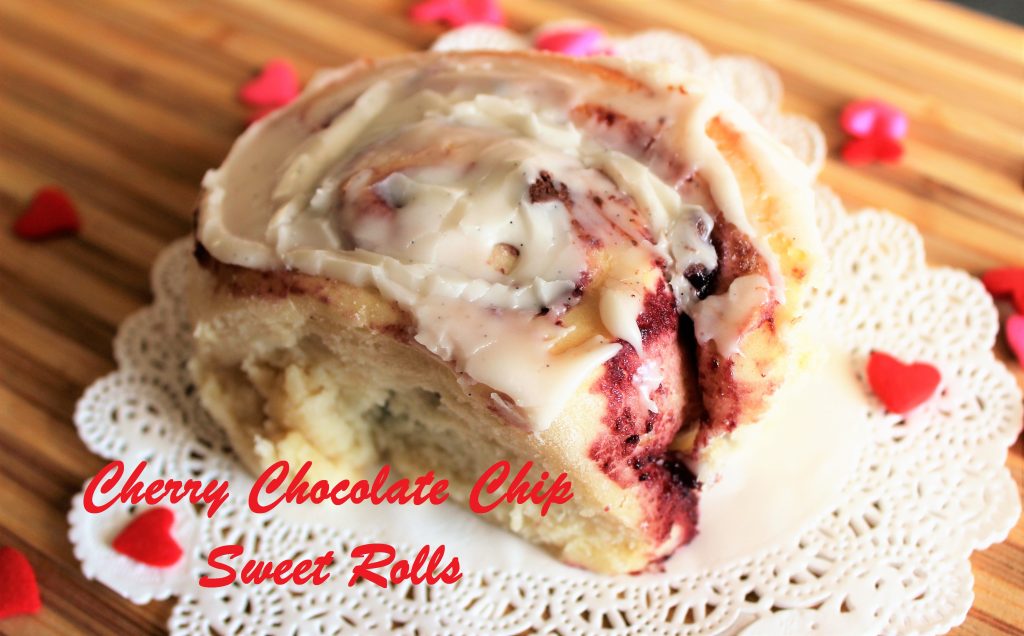
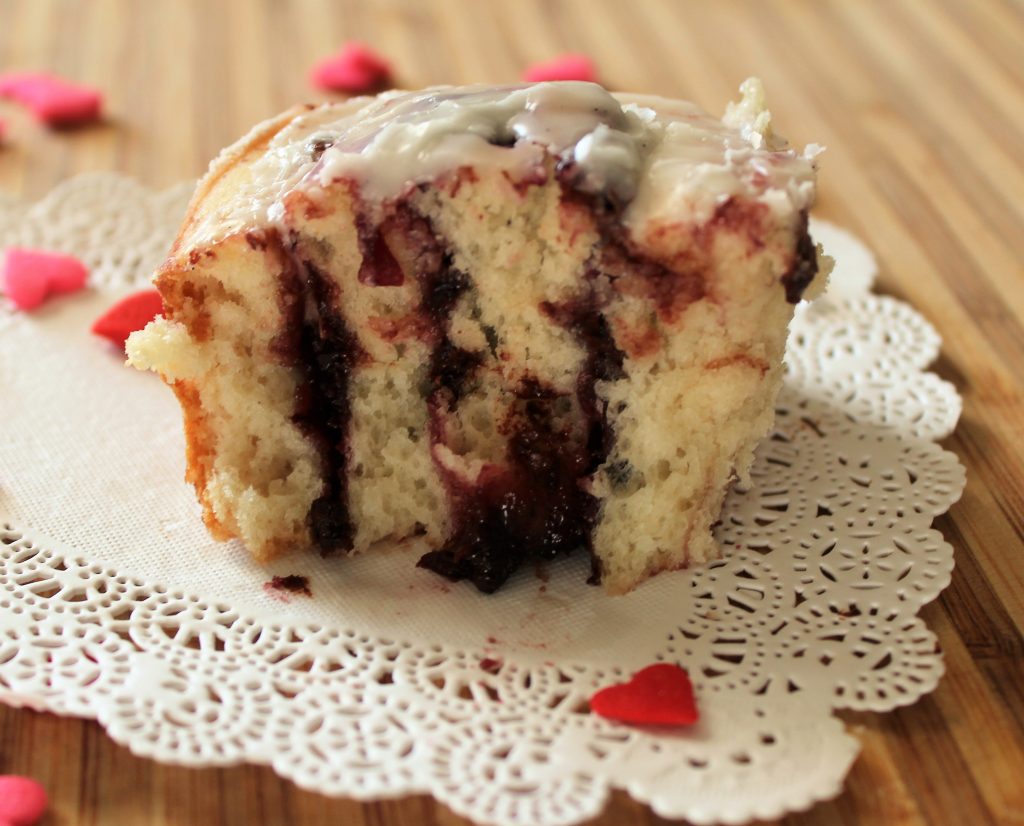
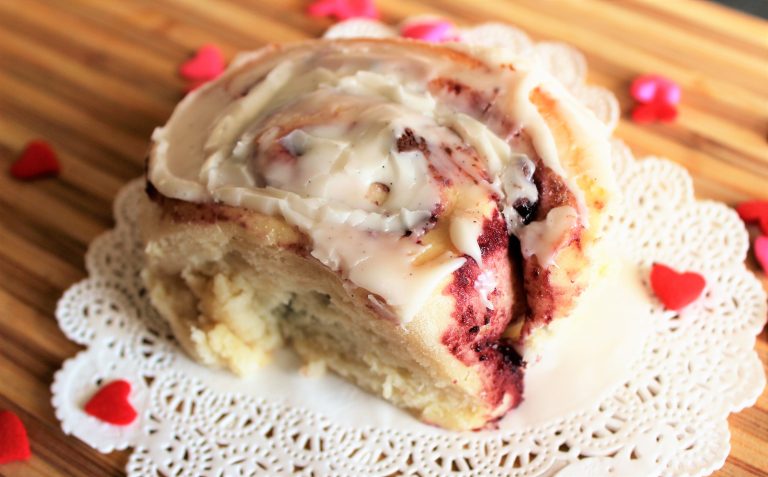
Hi everyone! I have something really exciting to share with you today! Oh – and I made you Cherry Chocolate Chip Sweet Rolls. 🙂

So I’ve been back down in Oklahoma, but this time I’ve been in Ponca City, which just happens to be the next town over from Pawhuska. Now, if you read many food blogs, or watch Food Network, you may recognize that name. That’s because it’s where Pioneer Woman lives, and where her Mercantile is located. Well, I was fortunate enough to get to go visit the Mercantile and eat dinner there! The store is really amazing, and the food was fantastic. I bought a cookbook and a few bowls, and then spent too much money at the bakery. 🙂 And dinner was worth the wait (the line was out the door when we first got there!). I had the grilled cheese, and others I went with tried the ribeye reuben, the chicken fried steak, and the fried chicken sandwich. They are all highly recommended by us!

That was exciting enough, but what made the day even better was that the lodge, the guesthouse on their ranch where Ree films her Food Network show, was open for tours that day, and I managed to get there just before they closed! It was really cool to visit both her “studio” and the Mercantile. The Pioneer Woman is one of the most successful and well-known food blogs, so for a new blogger it was a real treat. I definitely recommend stopping at the Mercantile if you ever find yourself anywhere near Pawhuska!

Anyway, let’s get back to these sweet rolls. They are somewhat inspired by Pioneer Woman, since I tried her cinnamon rolls at the bakery (too die for!!), and in the cookbook I bought she has a recipe for Raspberry Cream Cheese Sweet Rolls.  I was really craving some kind of sweet roll, and with Valentine’s day coming up, chocolate and cherry seemed to be an appropriate combination. 🙂

These start with a cherry curd, which is really simple to make. You just need frozen cherries, sugar, butter, egg yolks, and corn starch. The recipe makes about 2 cups, and you only need 1/2 cup for this recipe, so there is plenty left over. Spread it on toast, biscuits, pancakes, ice cream, pork chops….well, pretty much anything! You can also substitute any frozen berries in this recipe, and it would be just as delicious.

The filling is just the curd and chocolate chips, but there is so much room for adjustments! Prefer lemon curd? Go for it. Or want them even faster? Use a store-bought jam. Leave out the chocolate chips, or change up the flavor (white chocolate with the lemon curd would be perfect). Add nuts with the chips or in place of them. The possibilities are endless!

This recipe is scaled to make 6 rolls, but can easily be doubled to make a dozen in a 9×13-inch pan.

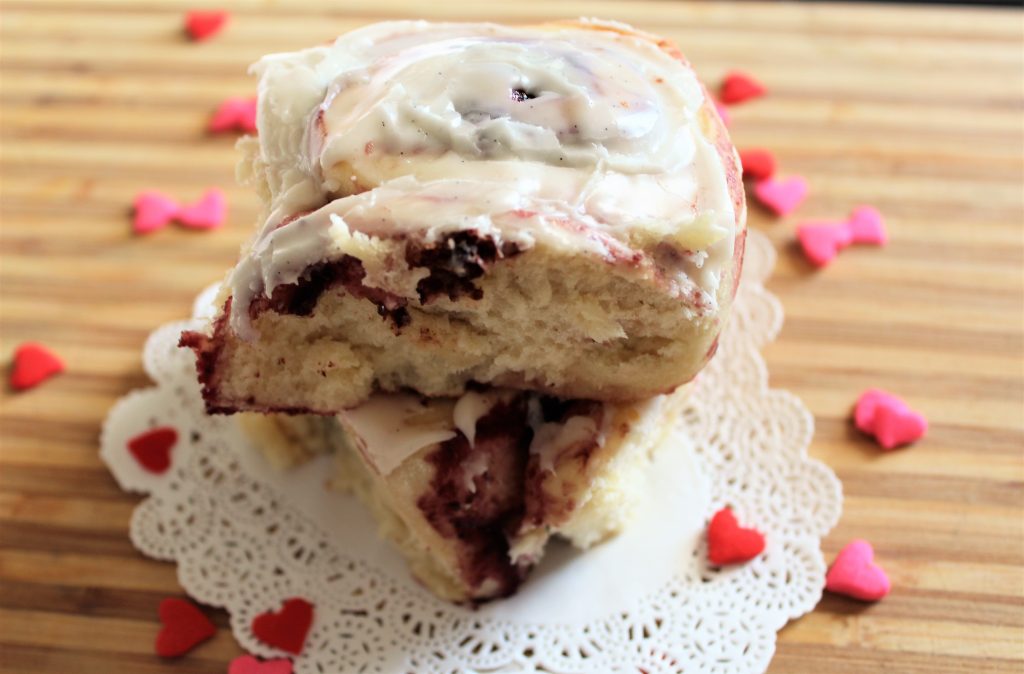
Oh, and did I mention these come together in about an hour, if you already have the curd made? That’s right – you are only an hour away from warm, chocolatey, sweet-tart cherry sweet rolls!


Print Recipe
Cherry Chocolate Chip Sweet Rolls
Course Breakfast
Prep Time 40 minutes
Cook Time 20 minutes
Servings
rolls
Ingredients
Course Breakfast
Prep Time 40 minutes
Cook Time 20 minutes
Servings
rolls
Ingredients
Instructions
  1. Combine 1 cup flour and the yeast in a large bowl, or the bowl of a stand mixer.
  2. Combine milk, water, sugar, oil, and salt in a microwave safe bowl. Microwave for 30 seconds at a time, stirring after each, until mixture is slightly warm, about 1 minute.
  3. Add the milk mixture to the flour and yeast along with the egg yolk. Beat with an electric mixer, or by hand, for 30 seconds or until combined. Scrape bowl, and beat at medium speed for 3 minutes.
  4. Either by hand or with a dough hook, add in the second cup of flour and mix until a soft dough forms. Knead, by hand or with the dough hook, for 3 to 5 minutes, adding up to an additional 1/4 cup of flour, until dough is smooth and elastic. It will be a very soft dough, and should be very slightly sticky. Cover and let rest for 10 minutes.
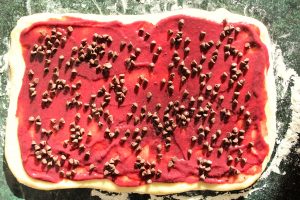
  5. Turn dough out onto a lightly floured surface and roll into a 7x12-inch rectangle. Spread cherry curd over dough, then sprinkle with chocolate chips. Beginning from the short (7-inch) side, roll up jelly-roll style. (If doubling, roll a 14x12-inch rectangle and roll from the long side.)
  6. Slice into 6 rolls and place, cut side up, into a greased 8-inch square pan. Cover and let rise until nearly doubled, about 20 minutes.
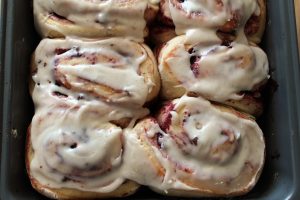
  7. Bake in a 375-degree F oven for 15 to 20 minutes or until golden brown. Cool slightly before topping with the powdered sugar glaze and serving. Store, covered, at room temperature for 2 to 3 days.
Recipe Notes

Cherry curd recipe here.

Powdered sugar glaze recipe here.

Recipe can be doubled to make 12 rolls in a 9x13-inch pan.

Substitute any curd or jam.

Substitute any flavor chocolate chips.

Add 1/4 cup chopped nuts instead of or in addition to the chocolate chips.

Flavor the powdered sugar glaze with extracts.


Share this Recipe